Space Shuttle Pinball
This is a repost of an article from my old site originally posted in 2017, in the hopes that the information within still proves useful for somebody.
This last weekend, we visited the Northwest Pinball and Arcade Show for a little bit. We had a great time, played a ton of games I haven’t touched until now, and got to meet and grab a picture with Steve Ritchie (Out of my games, designer of Terminator 2, and the voice in Space Shuttle)! I may make a post on what I thought about it, but I did indeed enjoy it - for the most part.The highlight of the day, however, was getting my best break in pinball purchasing so far. Just before leaving for the show, my awesome friend tipped me off to a Space Shuttle that had been put up not 10 minutes earlier on OfferUp! The seller had only posted one somewhat low-res picture, but it was a short detour from the show and they were only asking $600. I’ve been not only wanting an 80s solid-state for my next machine, but I was specifically looking for a space themed one, and Space Shuttle was at the top of my list. I had to at least check it out, so I called immediately and asked about coming up to look at it. We rounded back and grabbed my tools/lift-cart/moving blankets (don’t want to ding up the car like Cannes, my 70s game, did…).
The Pickup
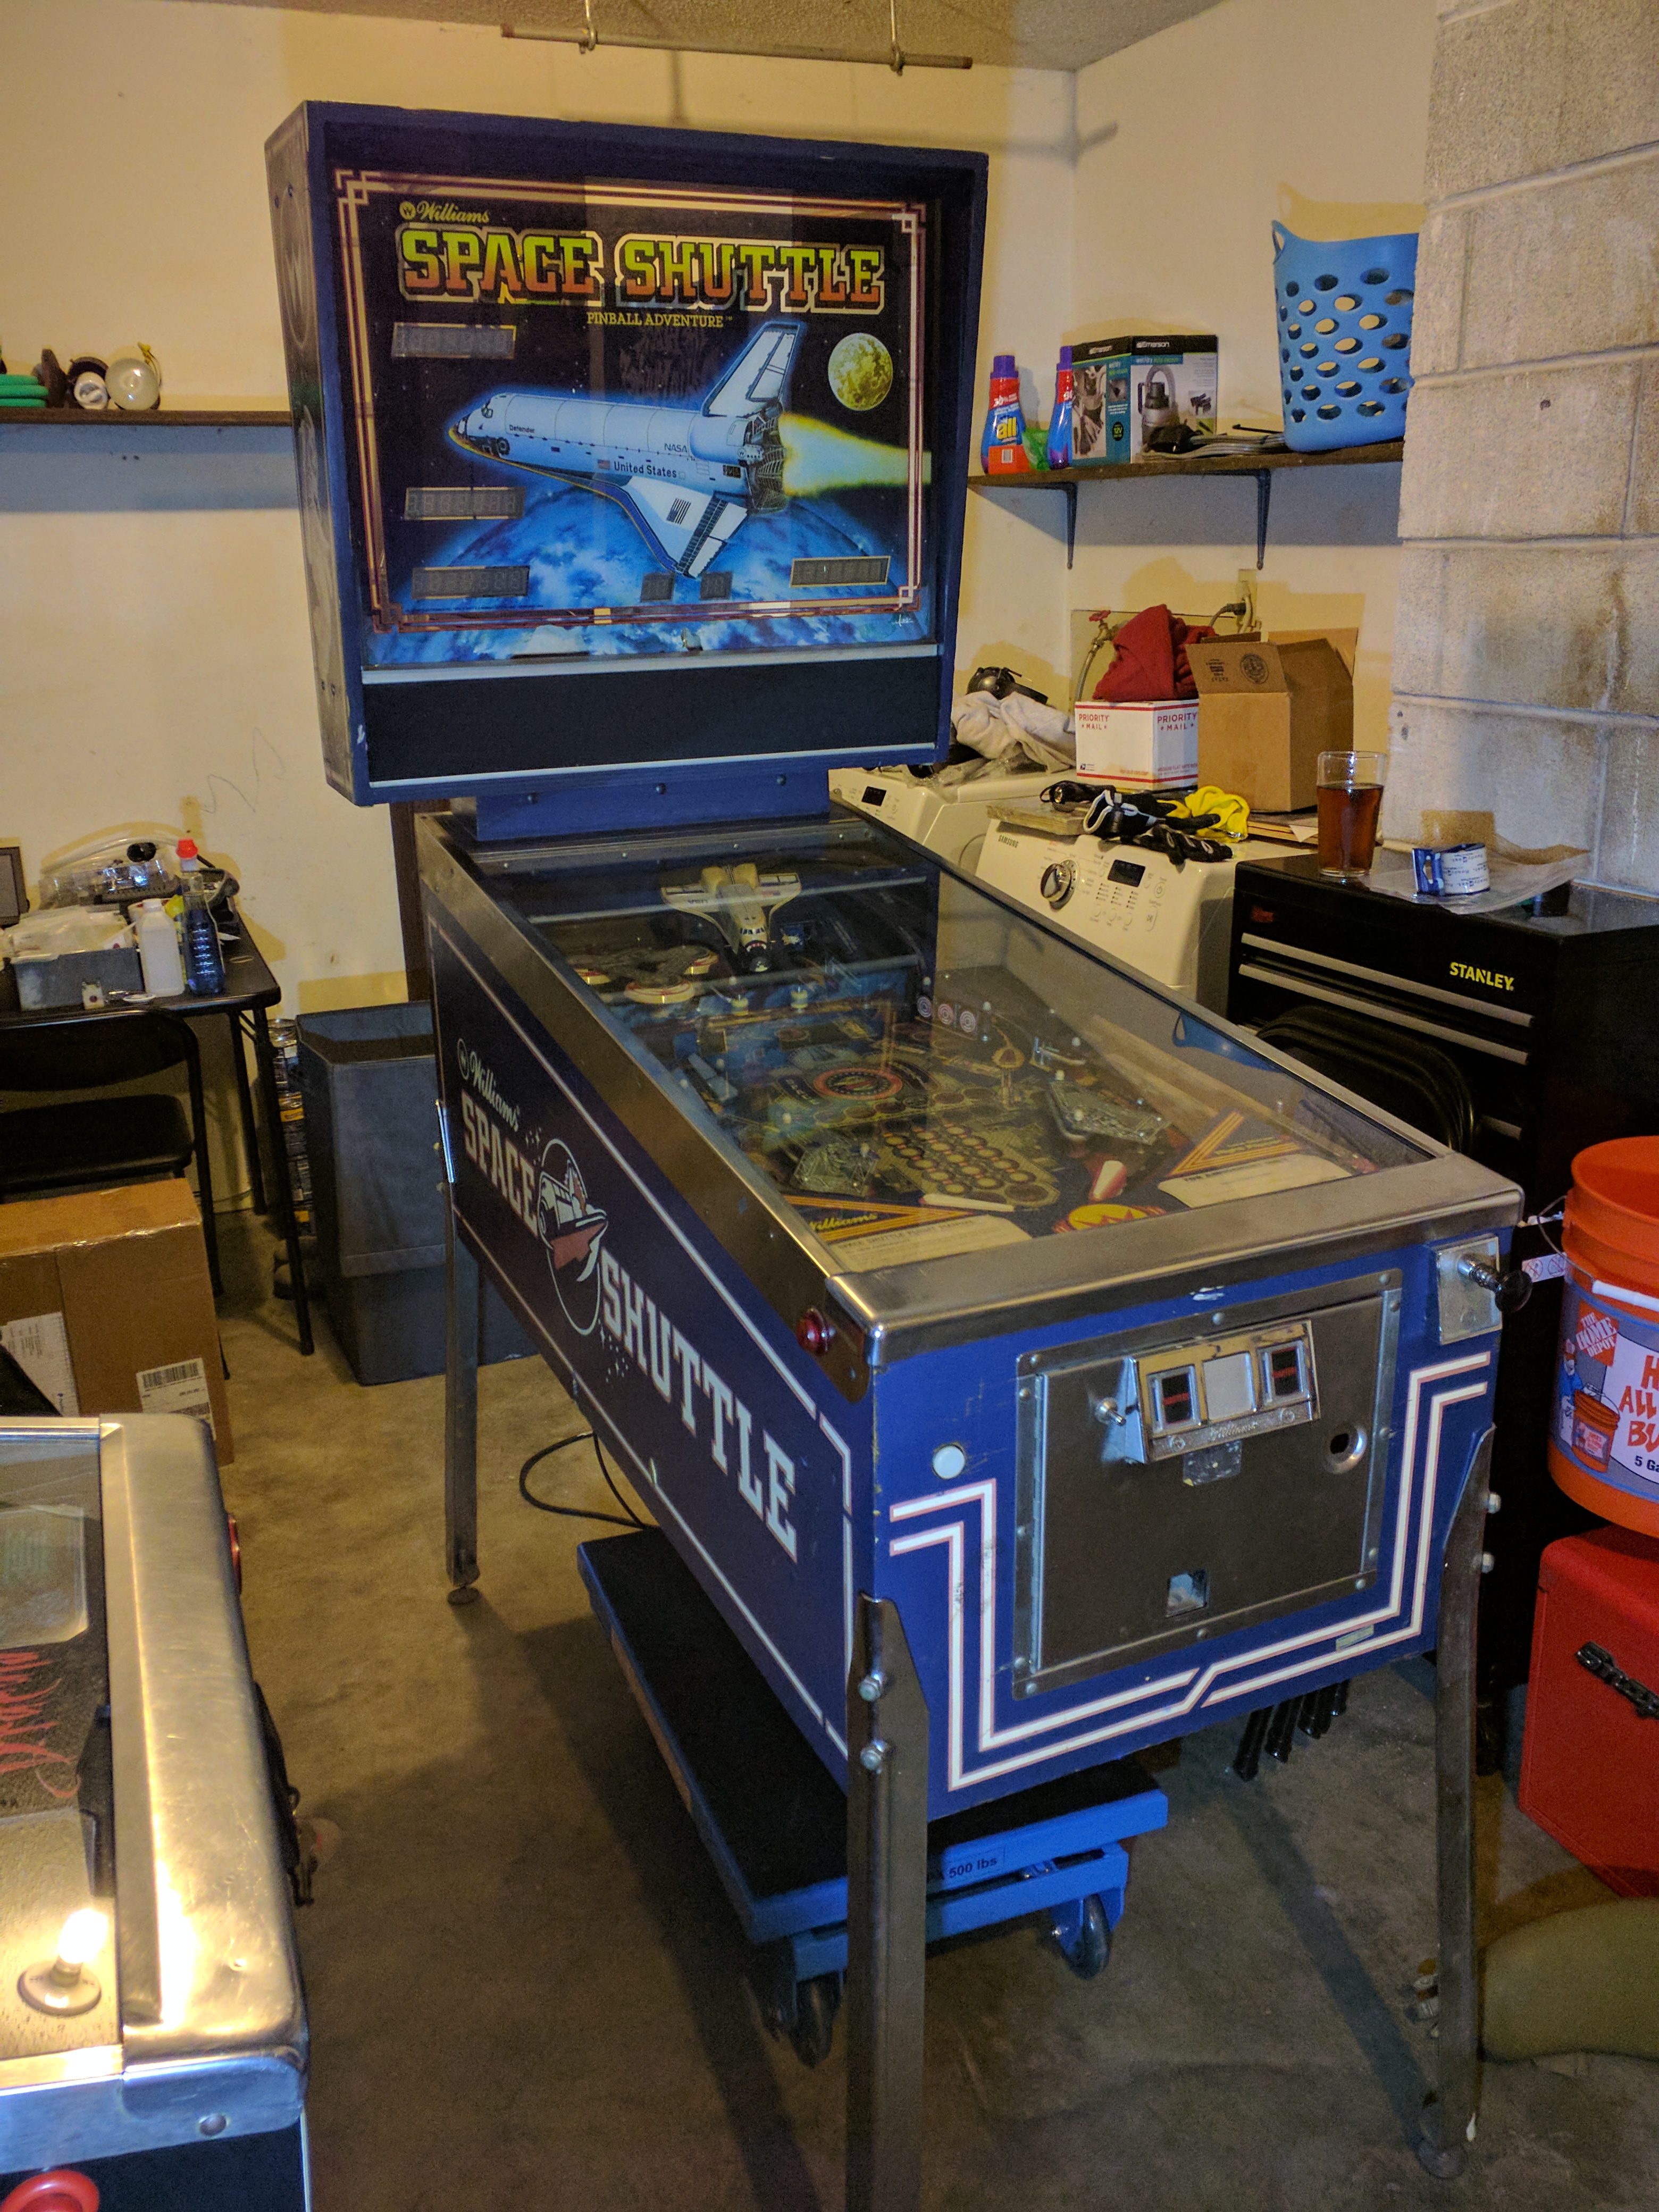

(This is after I took it back home - I did not get any pictures of it before picking it up)
(Note - These were the initial things I noticed before picking up. You can skip to the next sections for pictures)
On arrival, we went to a back room in the house and checked it out. Dust galore! I could immediately tell that this game was probably not cleaned in years, and the cabinet was faded. According to the seller, they bought the game 8 years ago from a pawn shop.
There was no serious damage and no chunks missing out of the cabinet. The playfield, besides grimy, had little wear from an immediate glance (at least compared to a lot of the Space Shuttles I’ve seen).
The backglass.. well, it had seen better days. The bottom of it was torn up. Luckily, there was no peeling or tearing up above the bottom line border, so the main image itself was untouched. It would need replacement, but wasn’t an immediate priority.
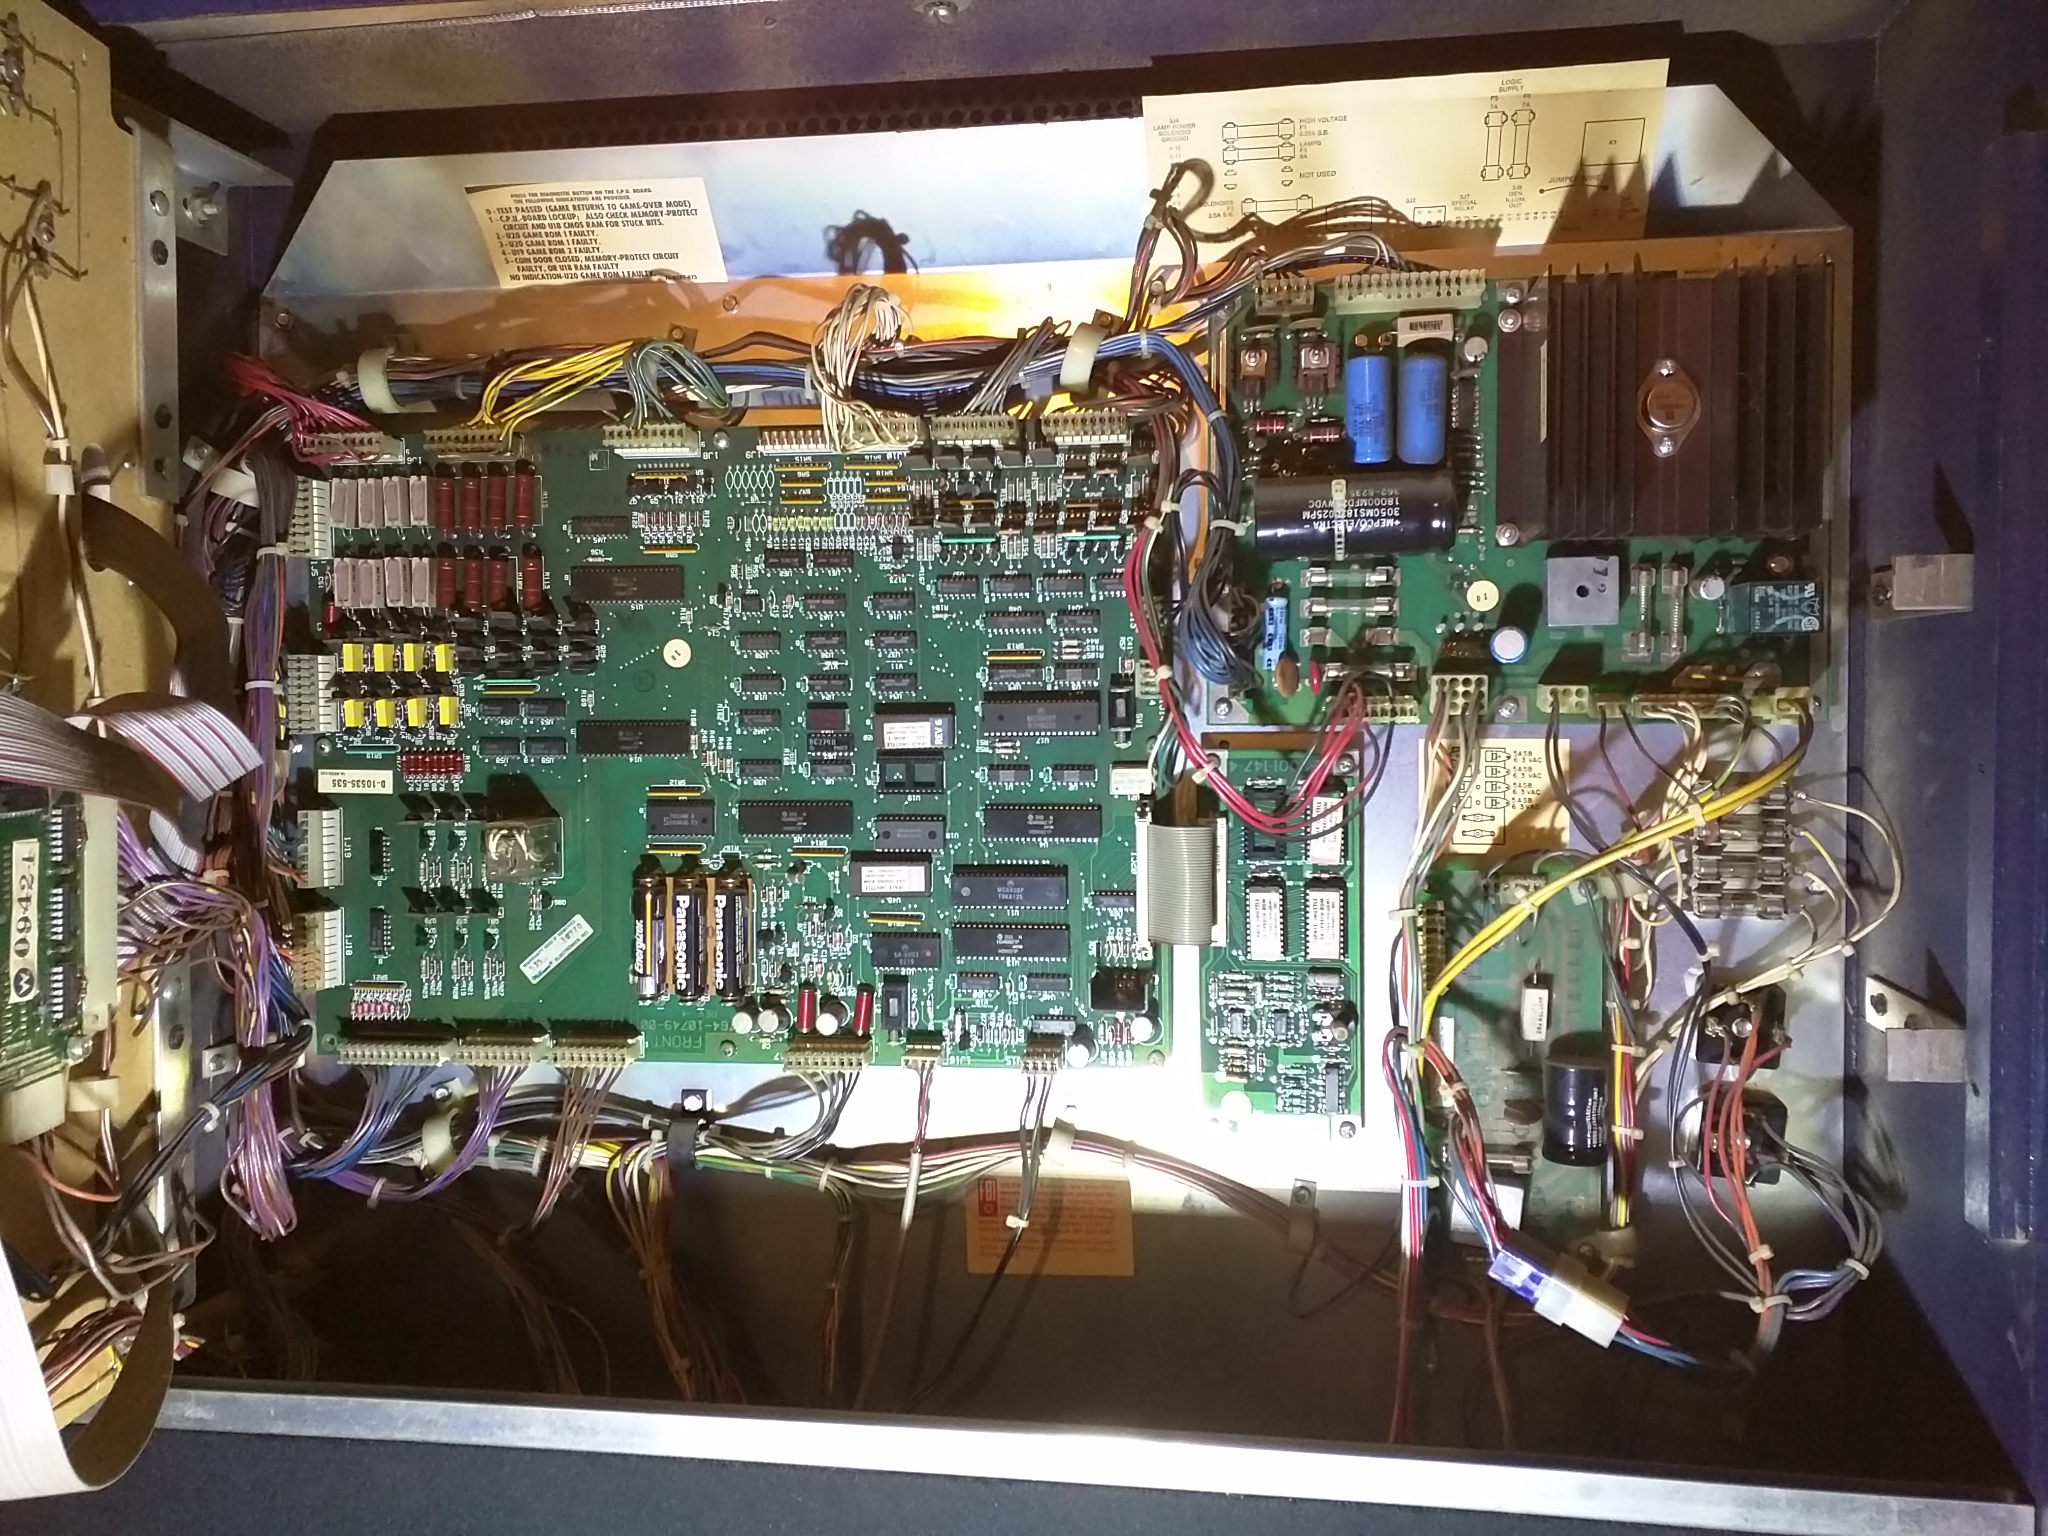
Opening up the backbox, I took a look at the boards back there. Apart from some more dust, they looked virtually new! No sketch repairs, boards looked very clean, and no battery acid leakage onto the PCB. The seller wasn’t aware that there was even circuitry in the backbox.. 8 years.. those batteries were troopers!
Now powering on the game, we run into an immediate problem. The ball popper is too weak to load the ball into the shooter lane, and they’ve had to resort to actually just pushing up on it from inside the cabinet to load the ball half the time! Shooting the ball, however, shows that all the switches are responding normally.
The flippers and slingshots are weak, but they function surprisingly better than I expected. Almost all of the lights were working, and the sound was coming out absolutely fine. The numeric displays all seem to work, and look great!
Looking closely at the playfield, I can see some of the wear up by the pop bumpers (pretty standard on these machines) that will need some touching up. The shuttle is also going to either need some significant work, or just get replaced. Overall, though, I’m pleased with it. Not only will I get some valuable experience from restoring this machine, but I still feel that the price is absolutely worth it.
Asking the seller, I did slip in a few minutes before the next several buyers. I don’t feel too bad, considering the number of games I’ve missed out on. We load it up, not too awful a process, and head on to the show.
Backglass/Backbox
With the game back in my garage, I can take a much longer look at exactly what’s going to need work, and what parts need to be replaced. The first thing that catches my eye (again) is the backglass. I wasn’t entirely sure what the going price for these were, and the price asked by a vendor at the show ($230) was a bit more than I was looking to pay.
Checking online, I can’t immediately find any for sale besides $275 at Marco Specialties. Hm.. maybe I should have grabbed the one from the show.. Oh well. I will need to keep my eye out for this one.
I tape down the remaining flakes (they are literally falling off as I take down the backglass) with some clear tape to try to hold their position and minimize further flaking/tearing for now.
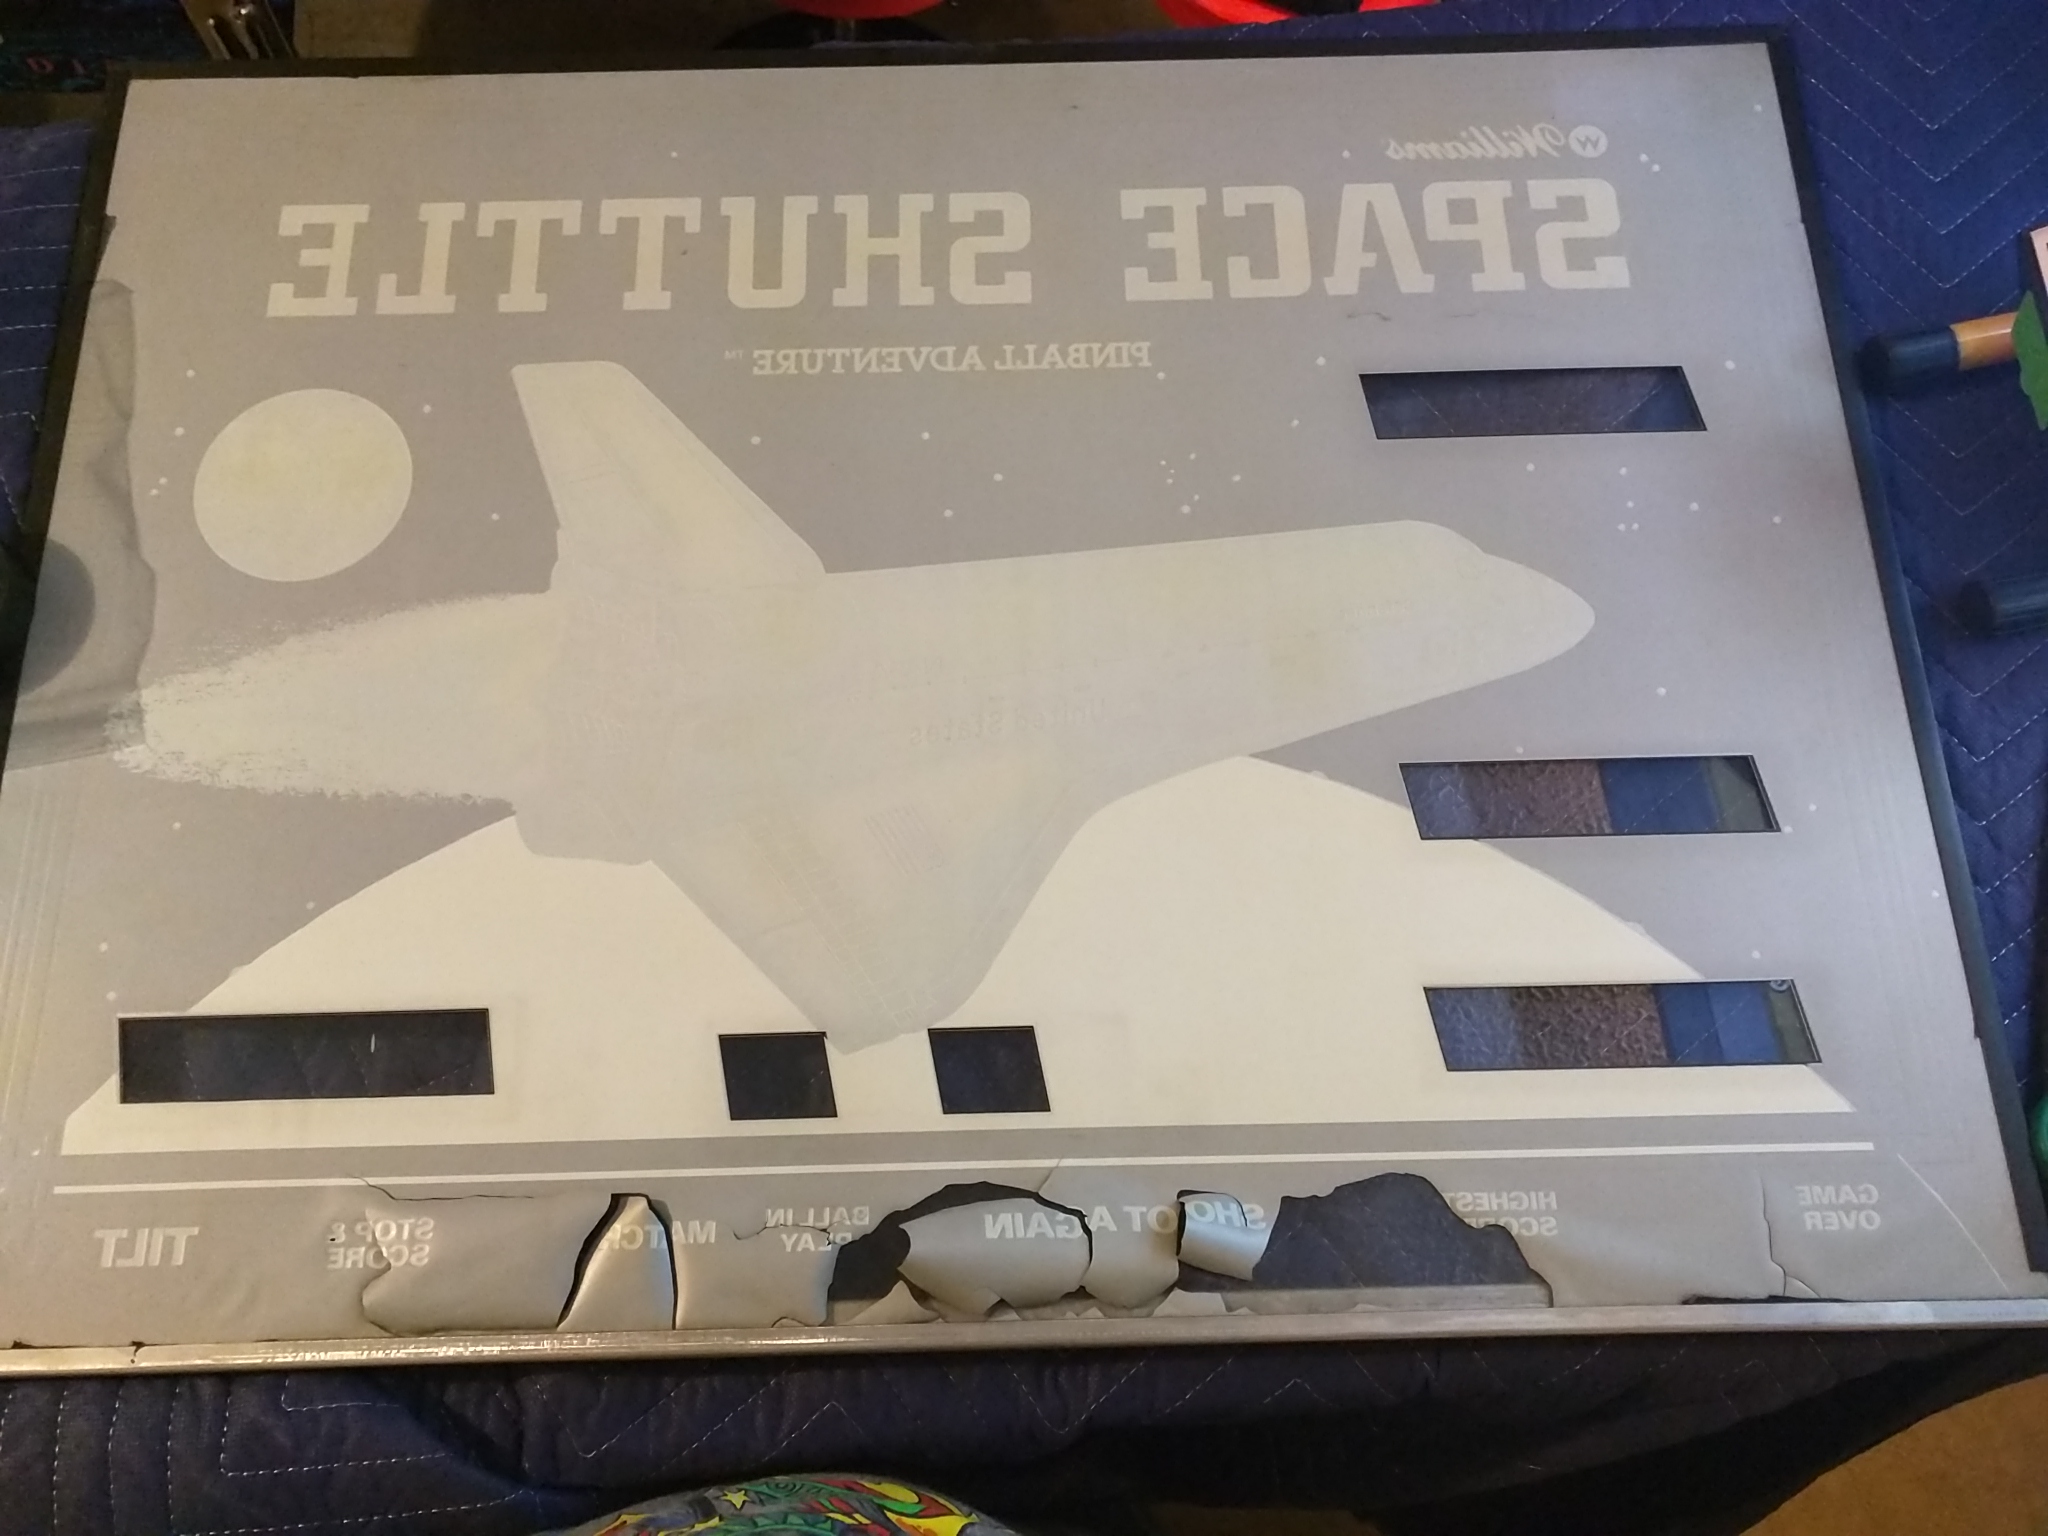
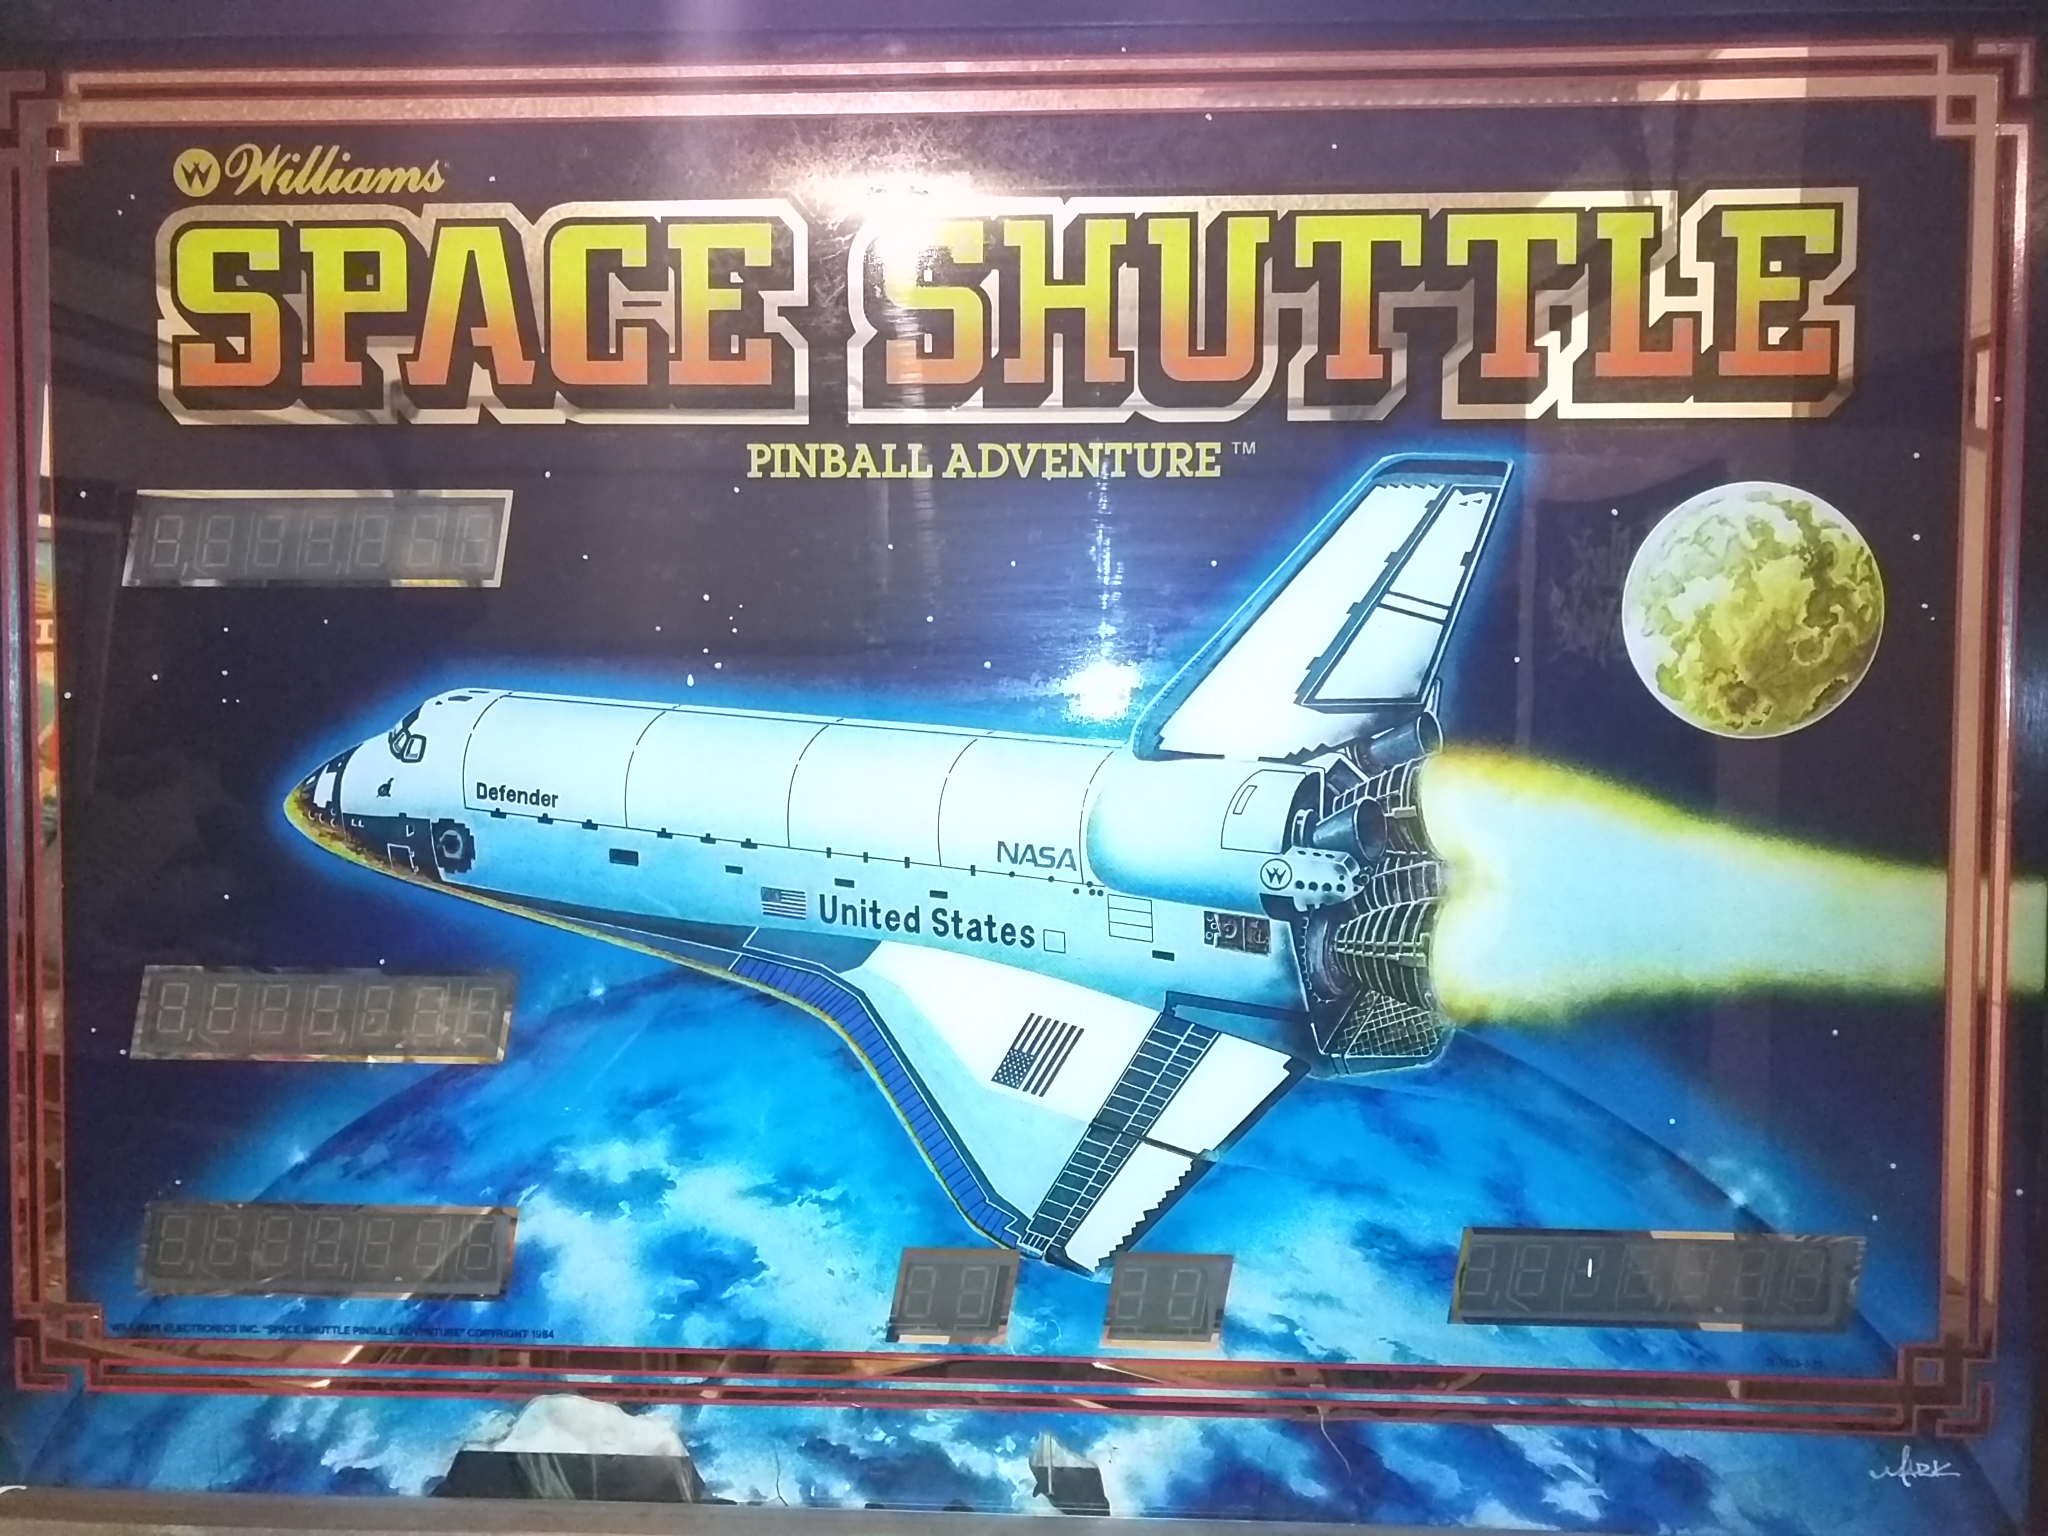
With the exception of the bottom area, the rest of the backglass actually looks great. If I am able to get this replaced, I would have no qualms about hanging the old backglass (with perhaps further protection or something to block the bottom section) as wall art.
I take a close look at the backbox circuitry, but once again do not notice anything that reaches out to me as damaged.
Playfield
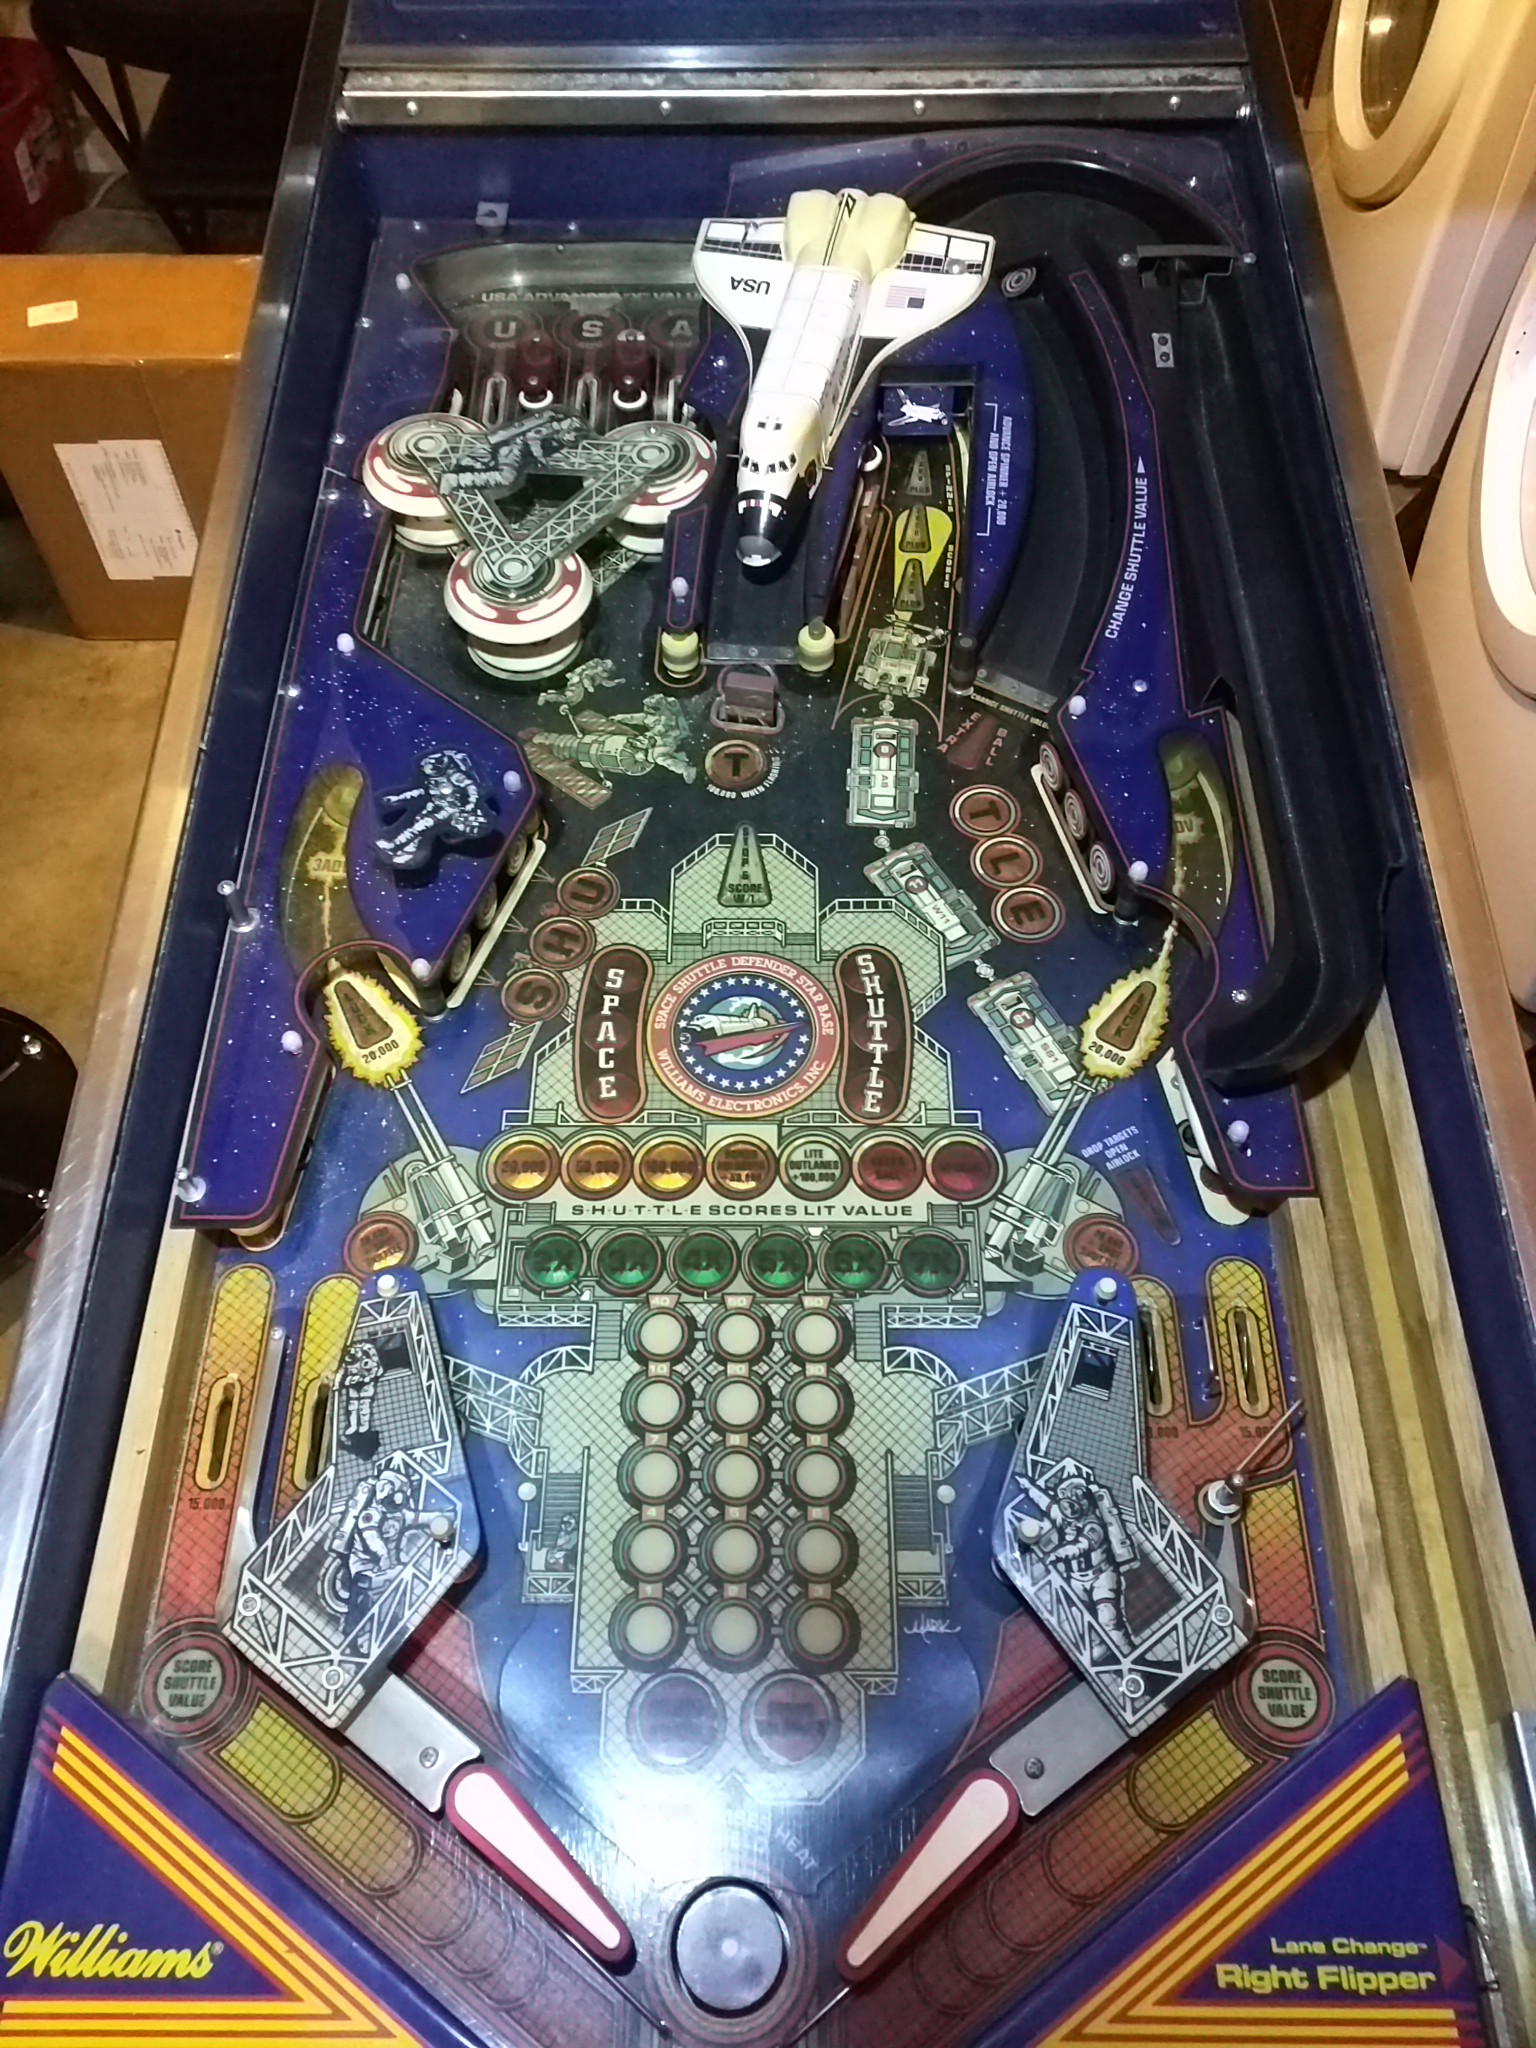
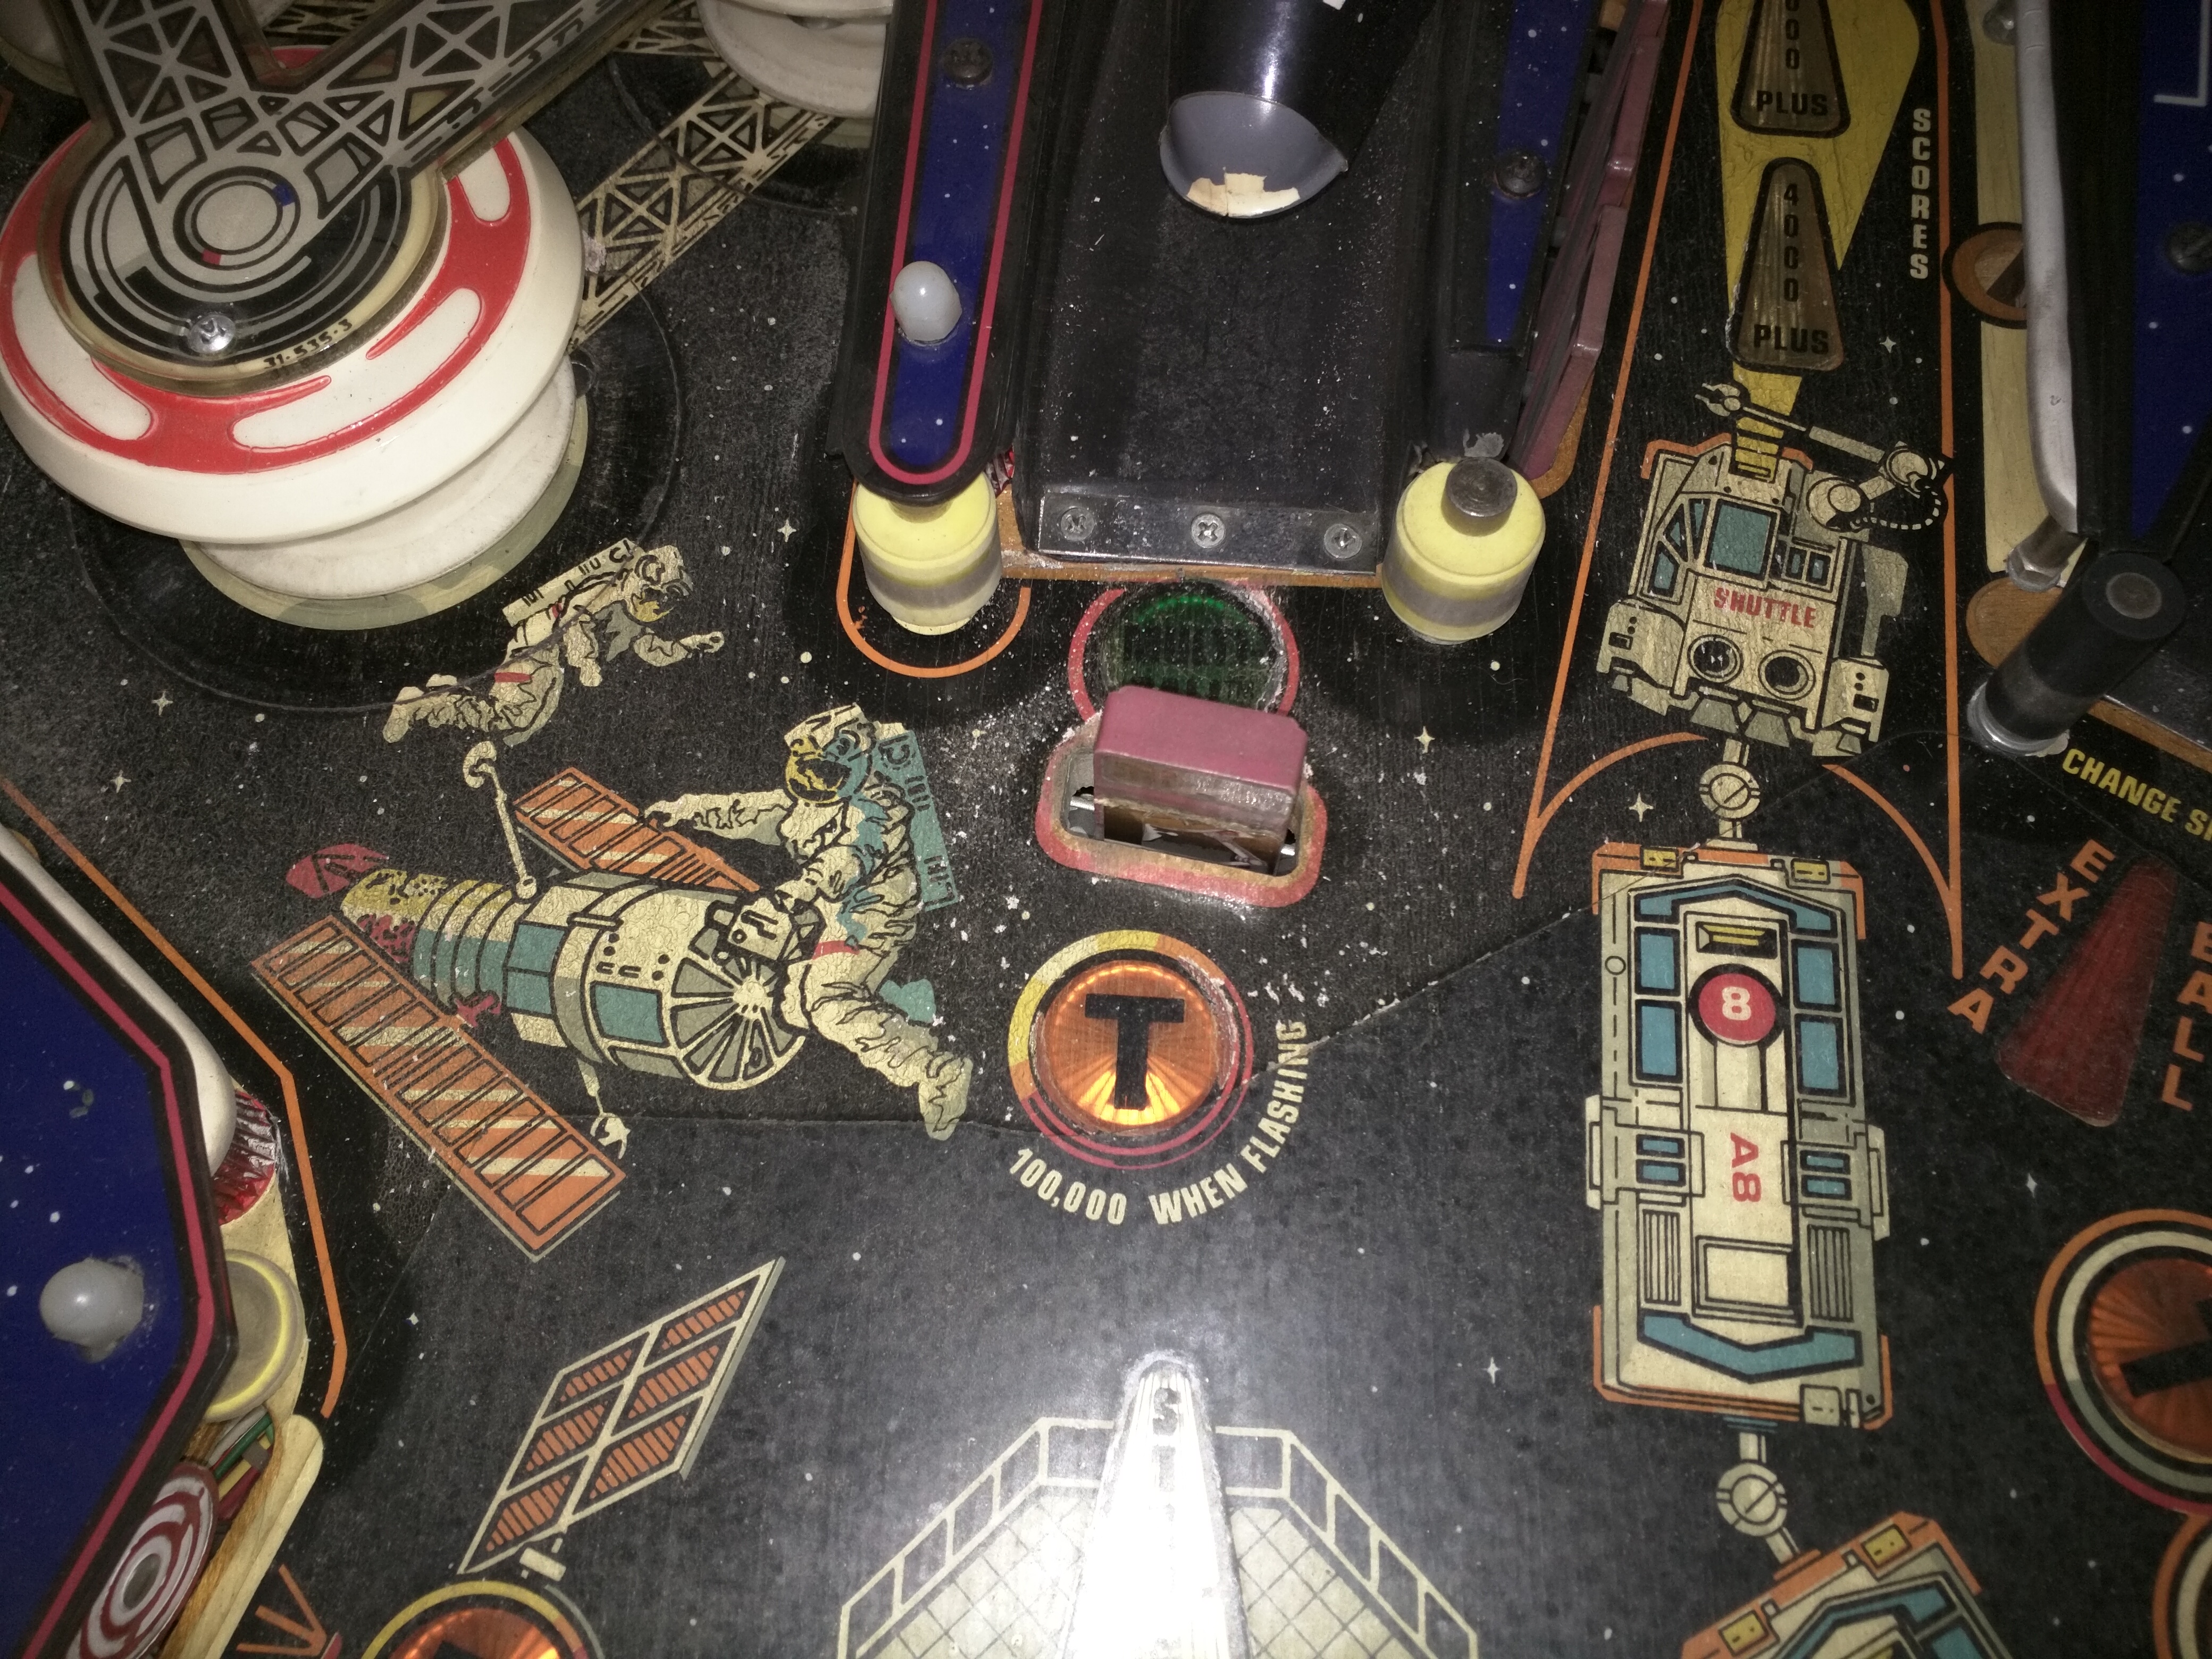
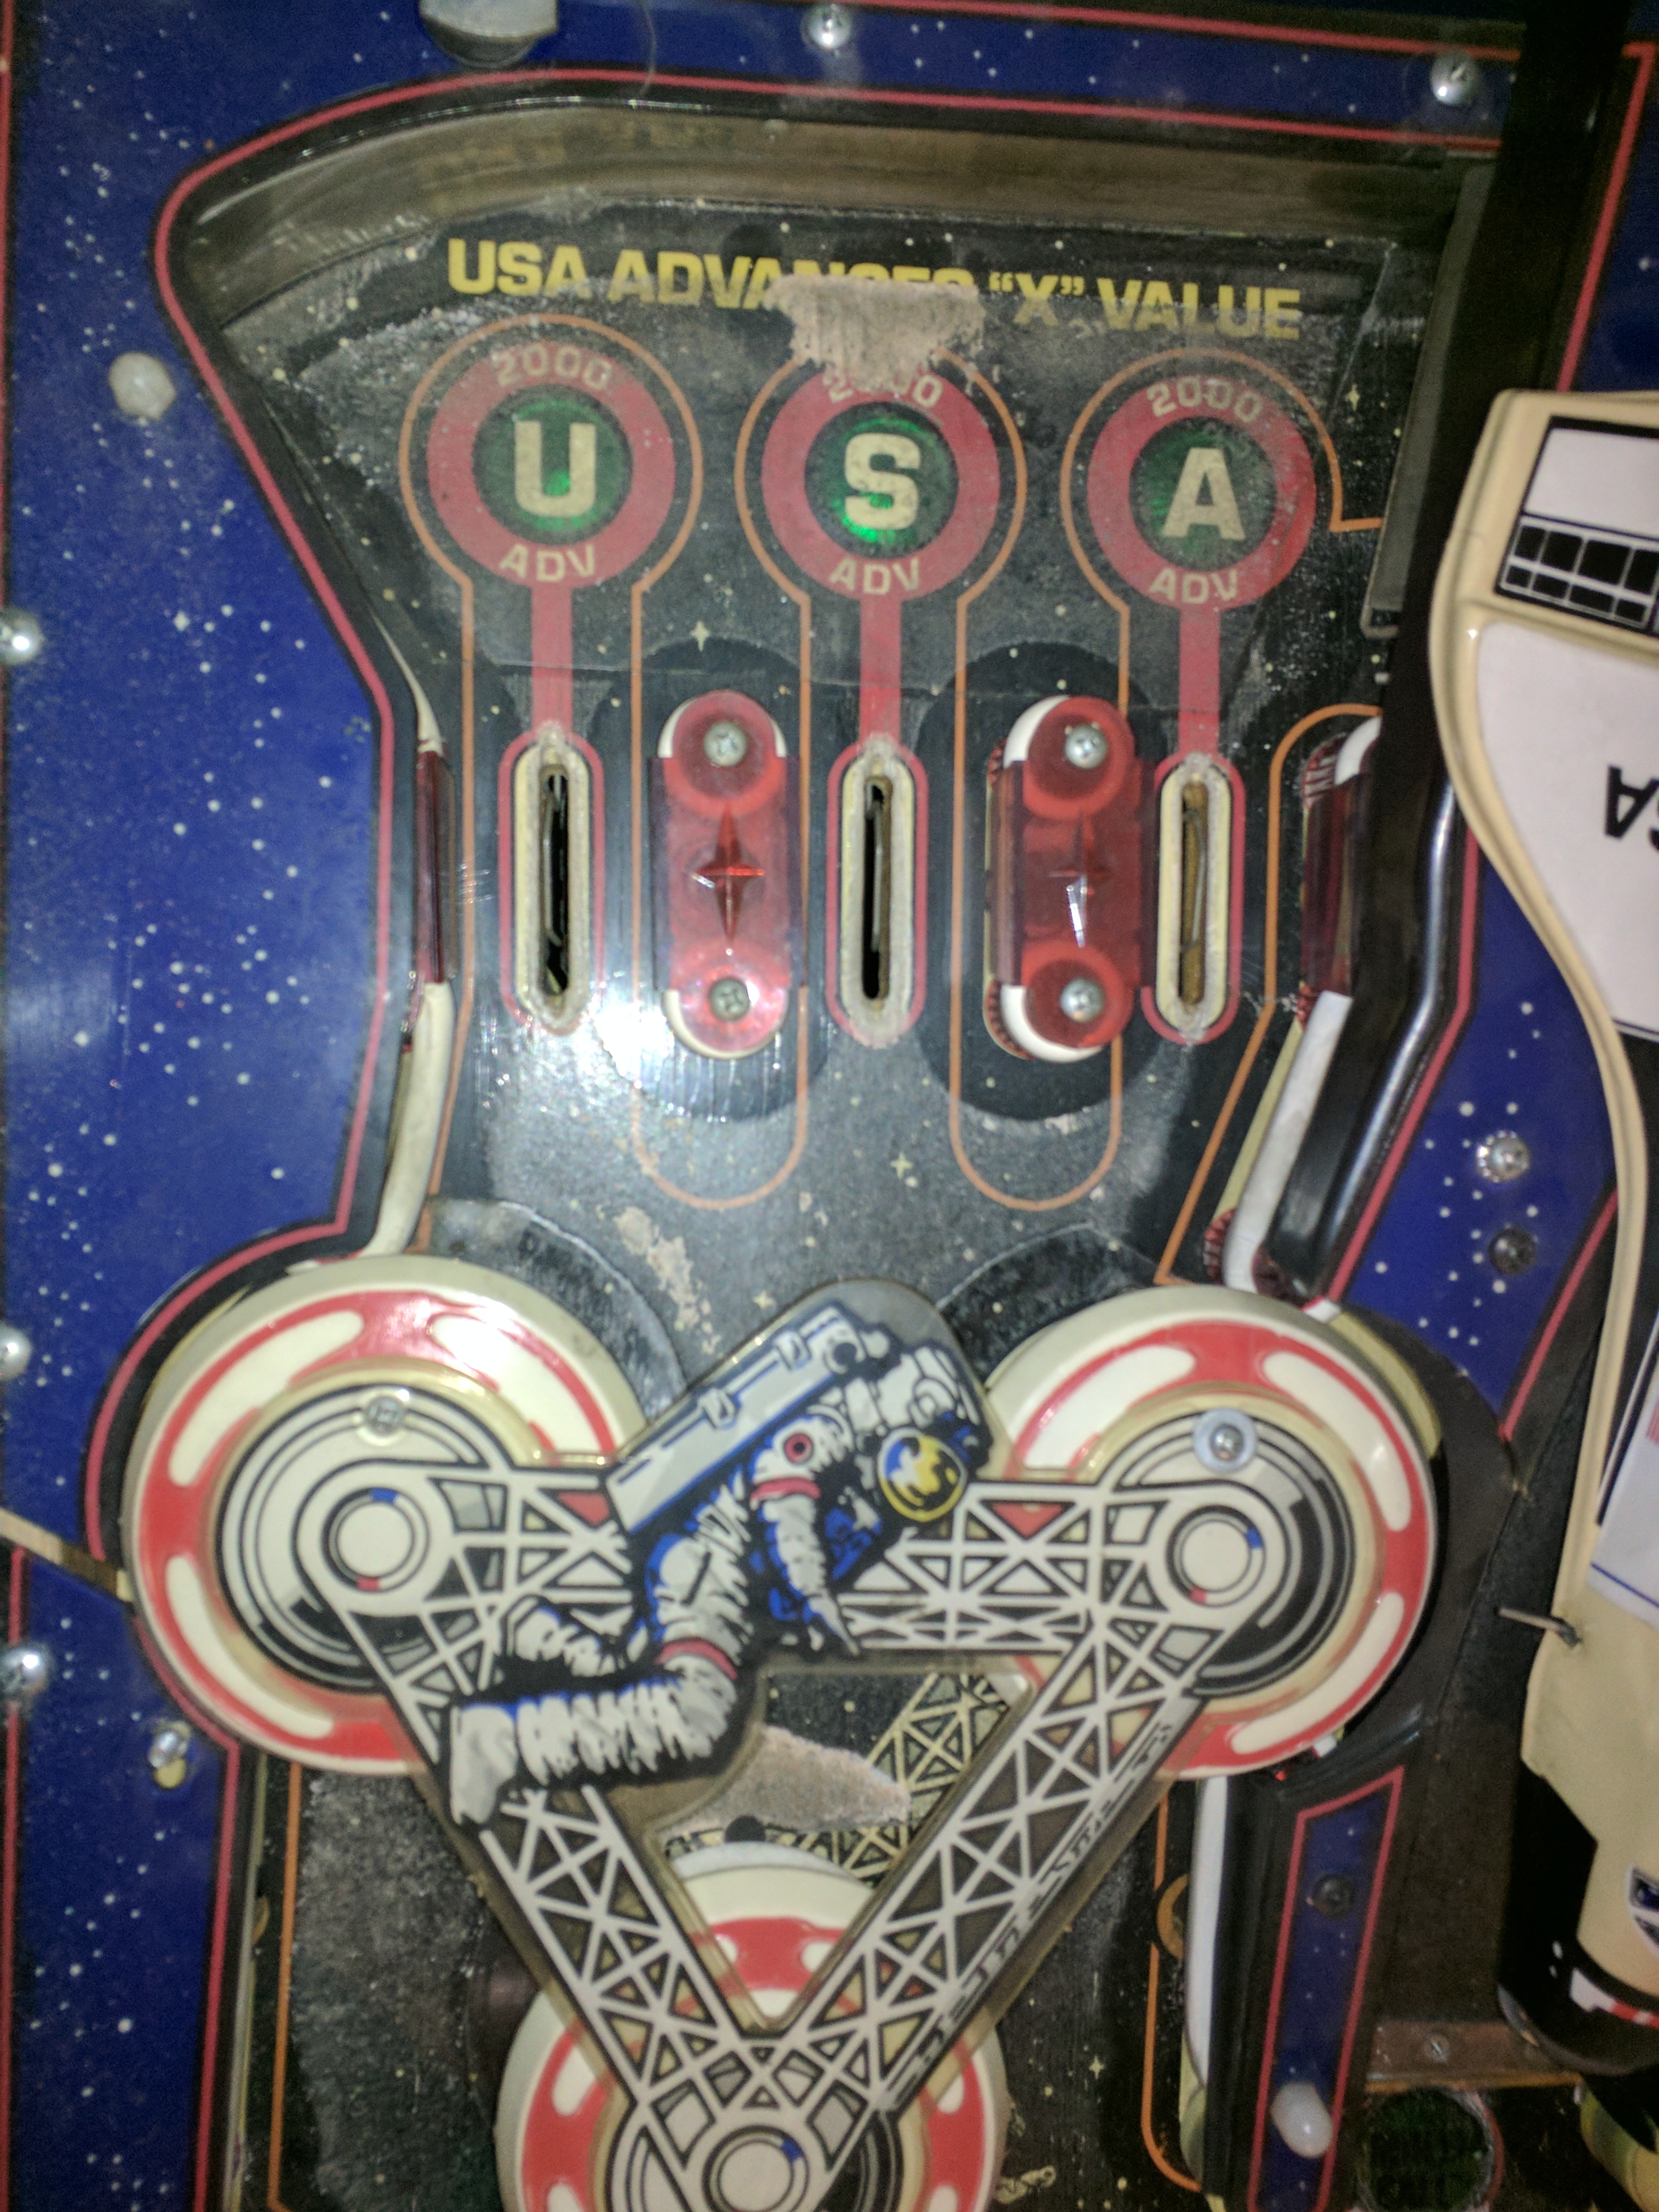
Pulling off the glass, I can see the playfield up close and take a few pictures of the critical areas. By far, the worst areas are the bumpers and lanes above them, and the entrance to the shuttle ramp.You can see that the playfield is worn away above the S insert, and directly above the bottom pop bumper. For the ramp, the drop-down target is obscuring it, but there is some wear directly behind it.
The main playfield with it’s huge bank of inserts is actually looking great. Contrast this with one of the Space Shuttles I saw at the show. The game had great lighting, nice cabinet and backglass, but the playfield was pretty torn up!
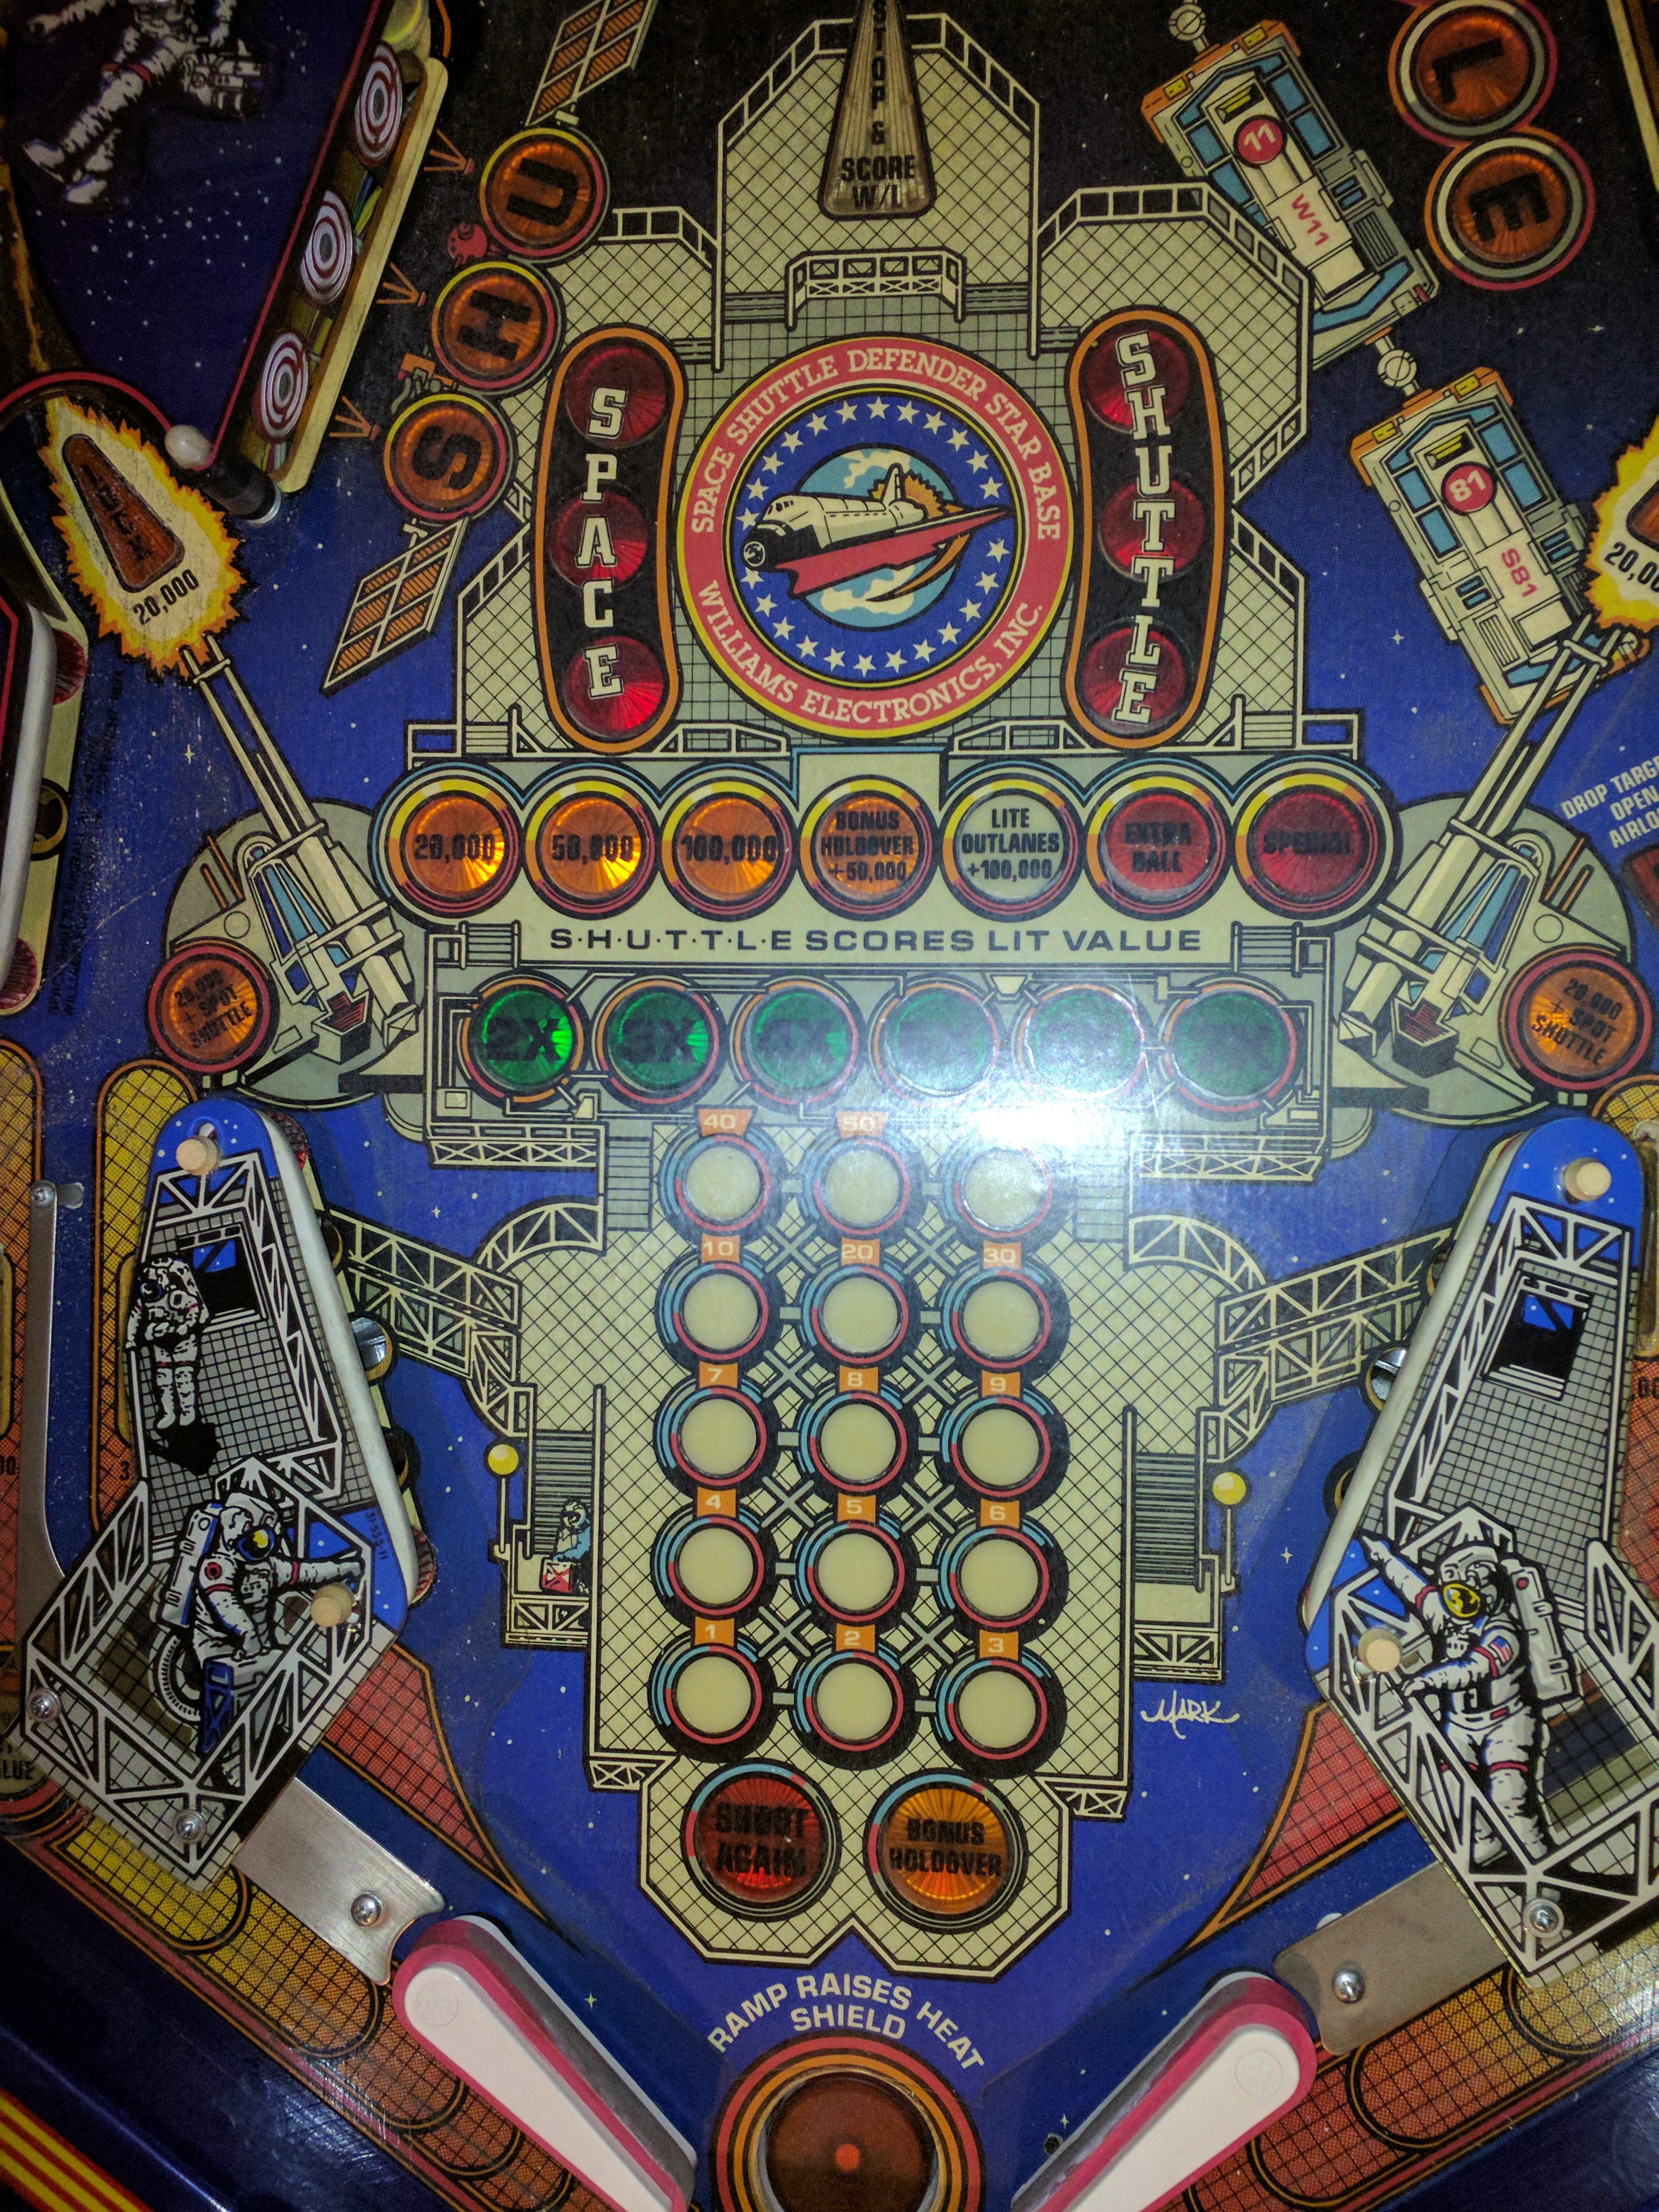
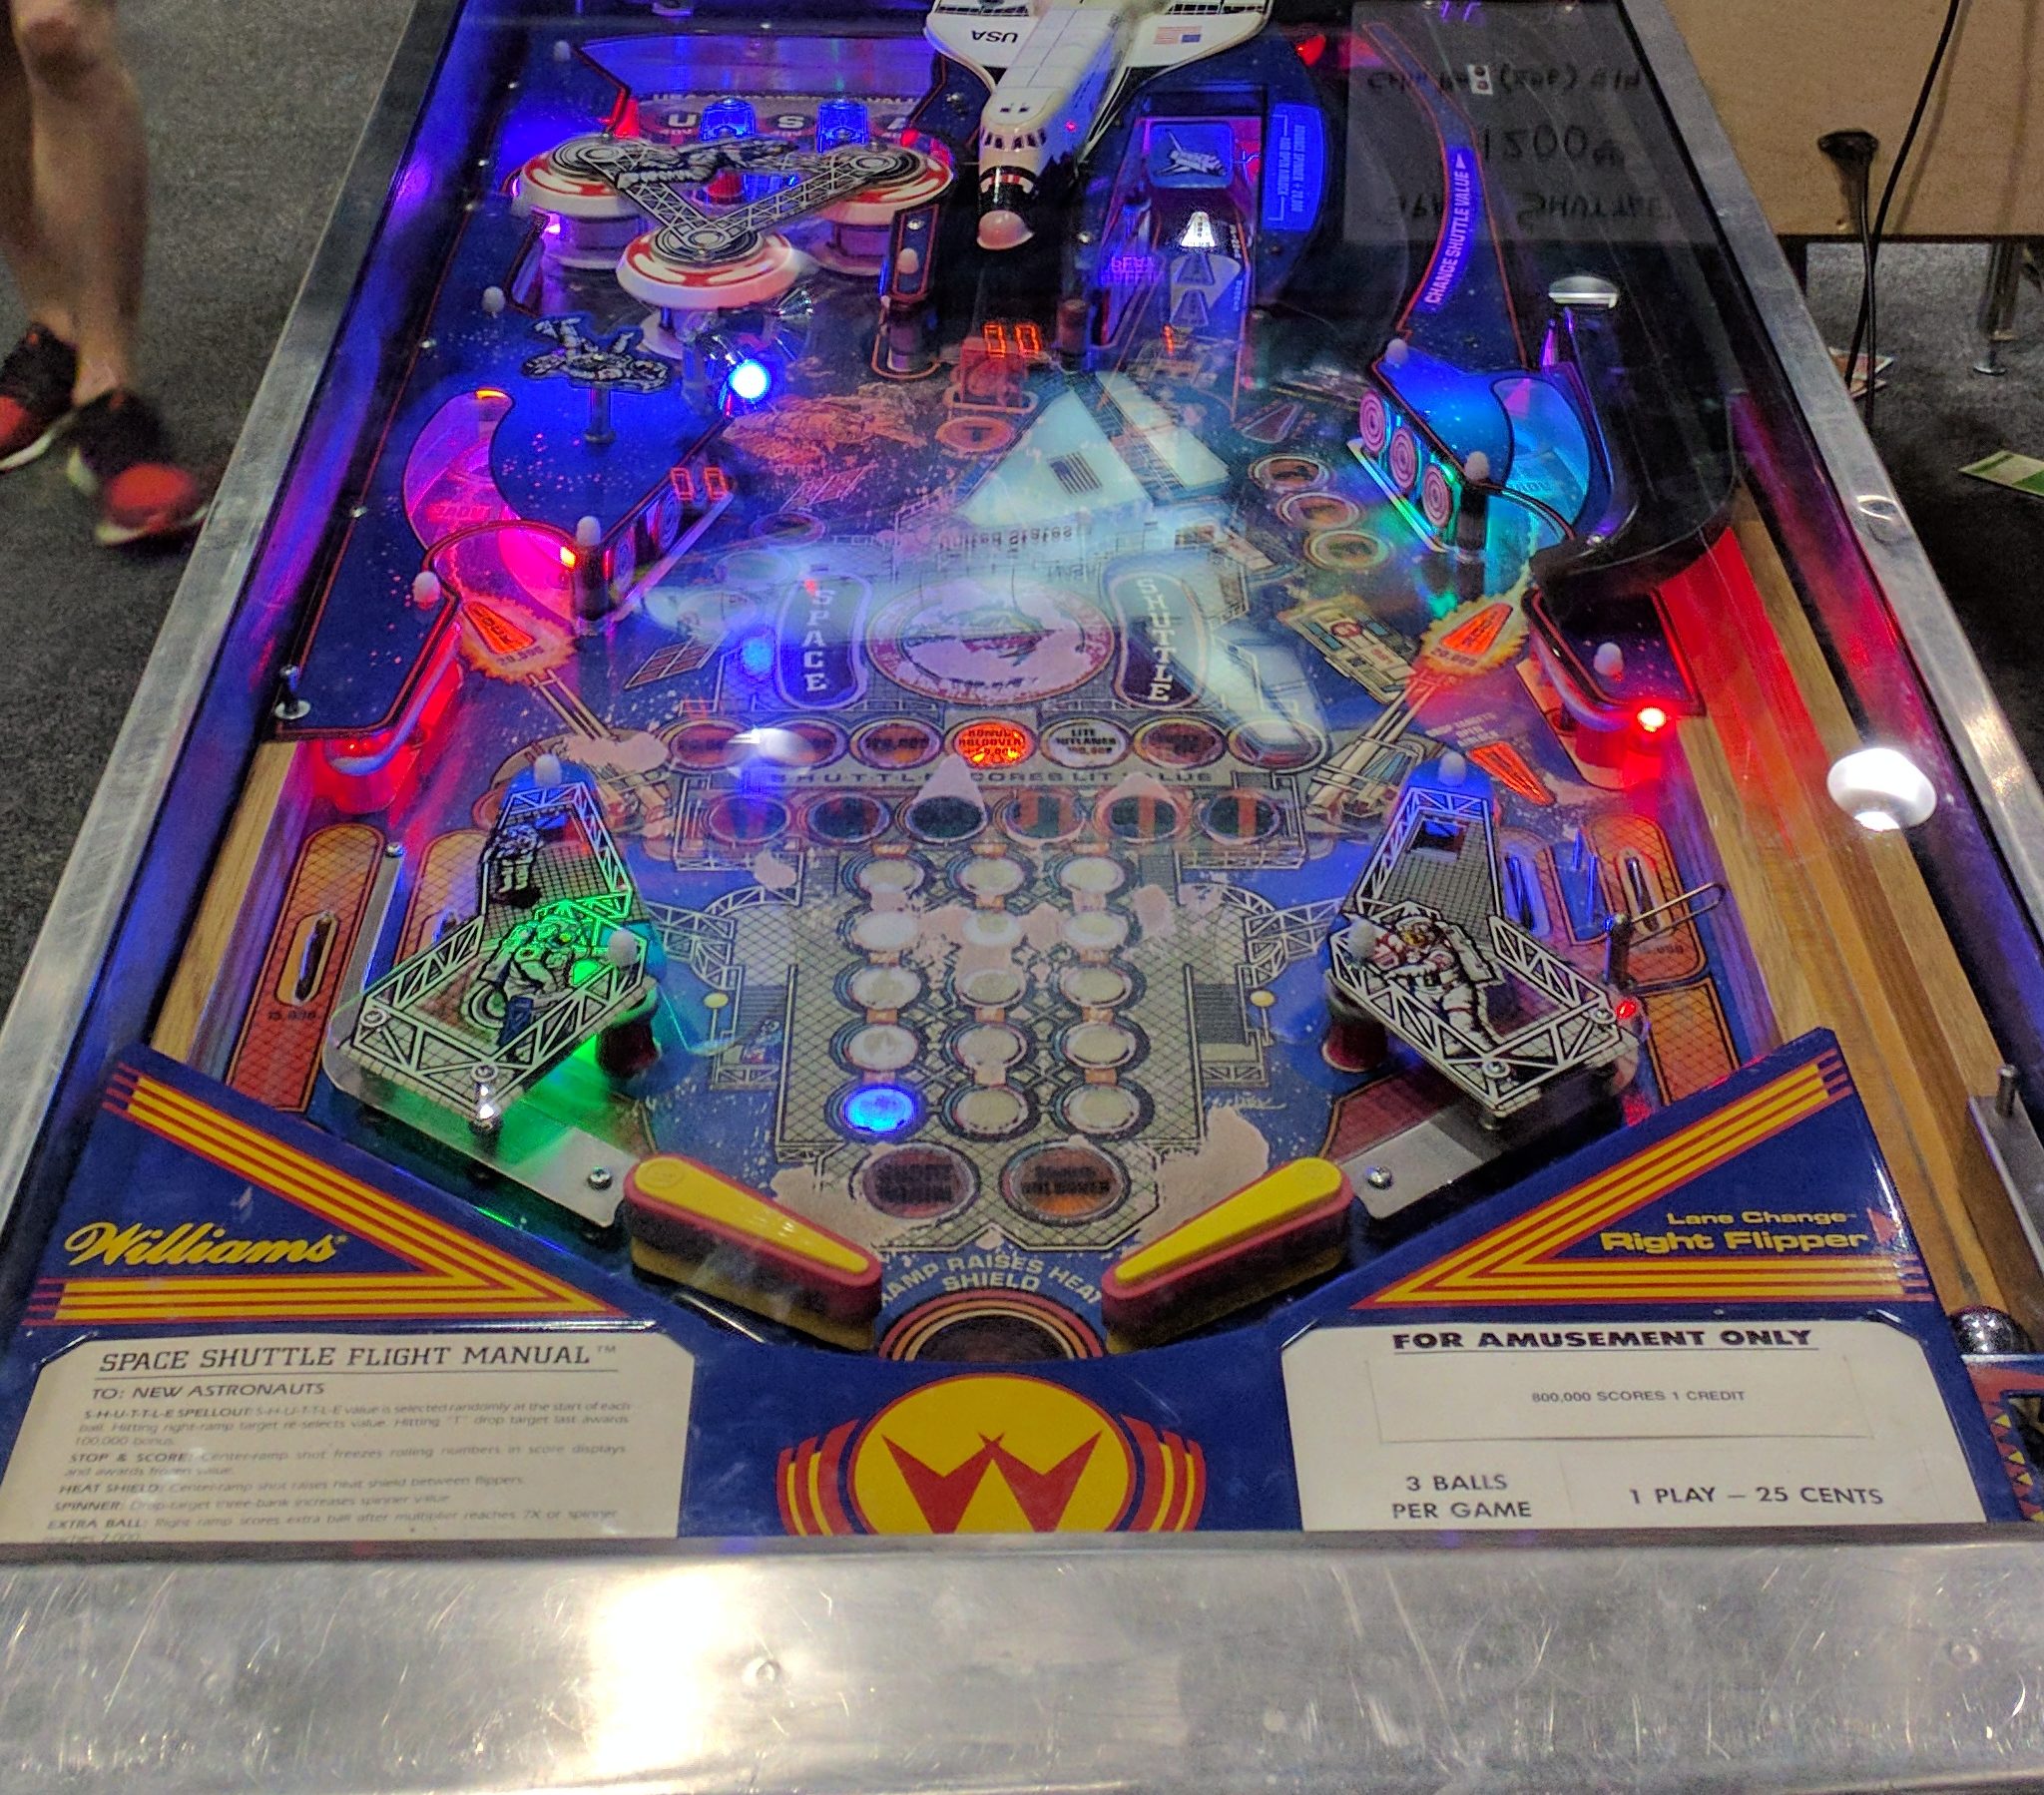
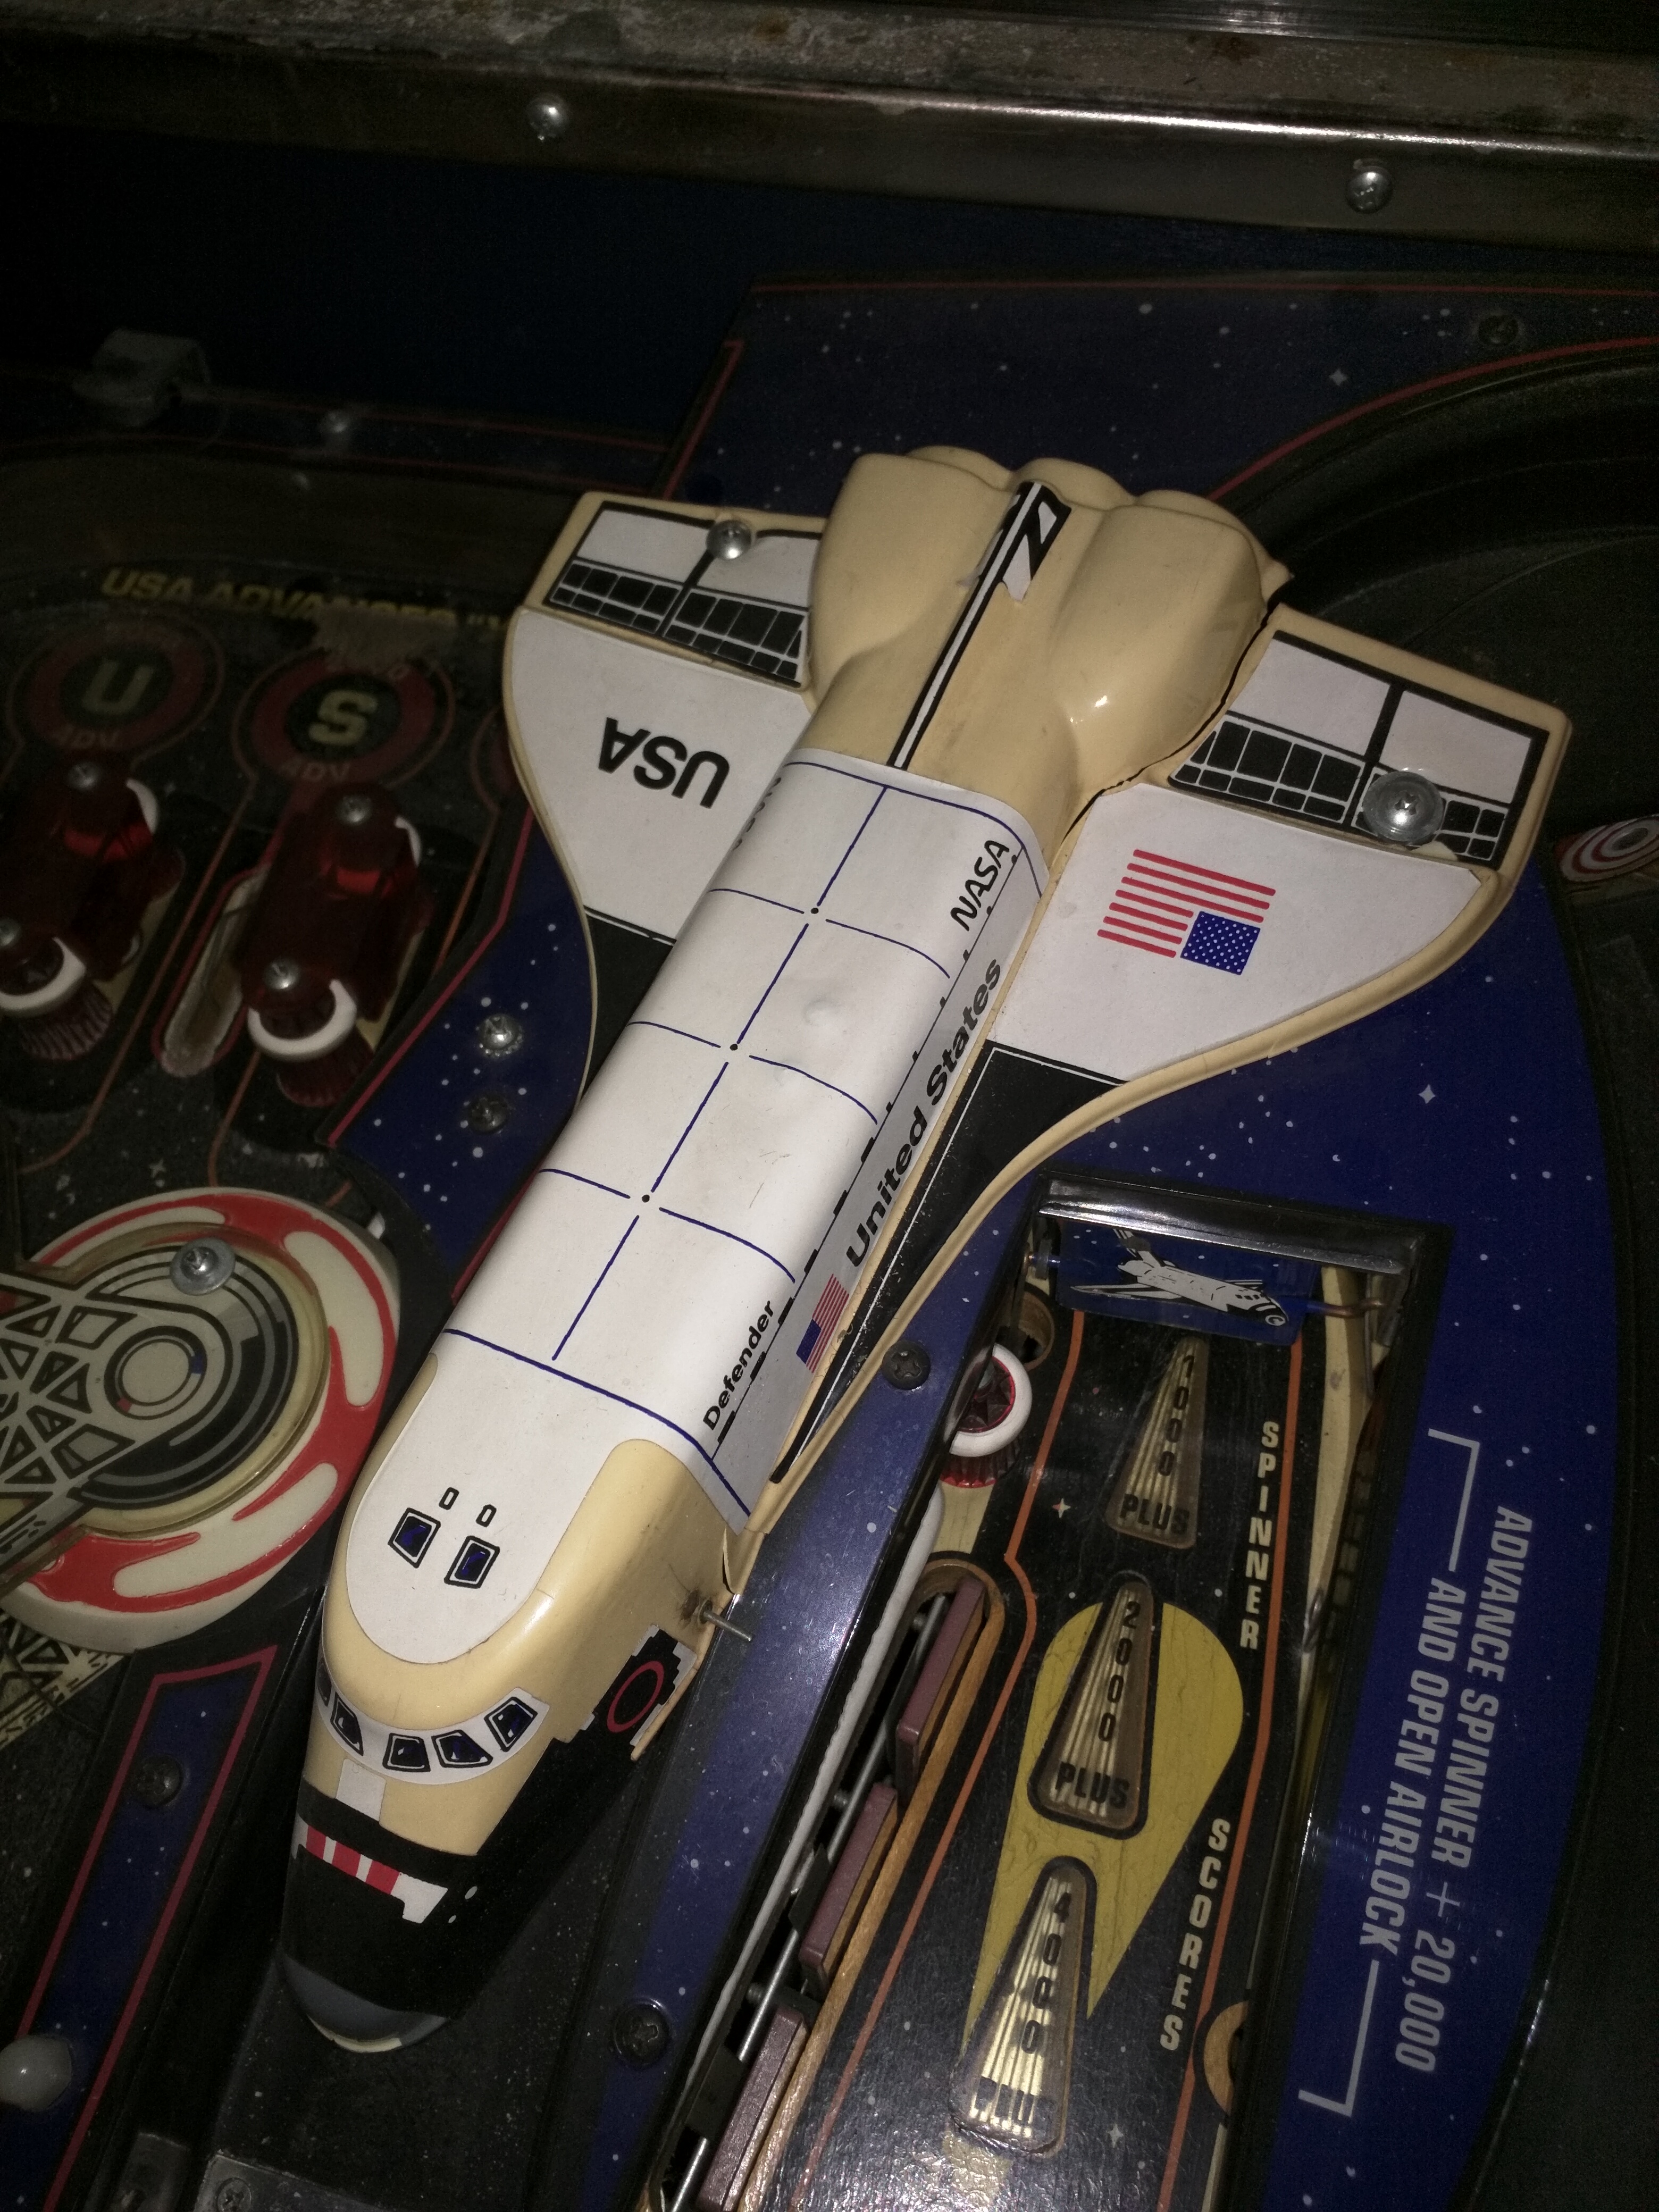
There are no cracked or broken plastics at all, and the few slightly warped ones can be repaired with some heat.The Shuttle toy is looking a little beat up. The wing with the flag is broken, and there’s some damage near the nose. It’s also yellowed pretty significantly. I may need to find a replacement for this, or repair and repaint it, then get new decals.
Under Playfield/Inside Cabinet
Lifting it up, I look for any obvious issues that will need to be addressed. I already know I’m going to need to clean or replace the coil that loads the balls into the shooter lane. I will probably rebuild the flippers as well, since they are misaligned and weak, and I really could use the experience.
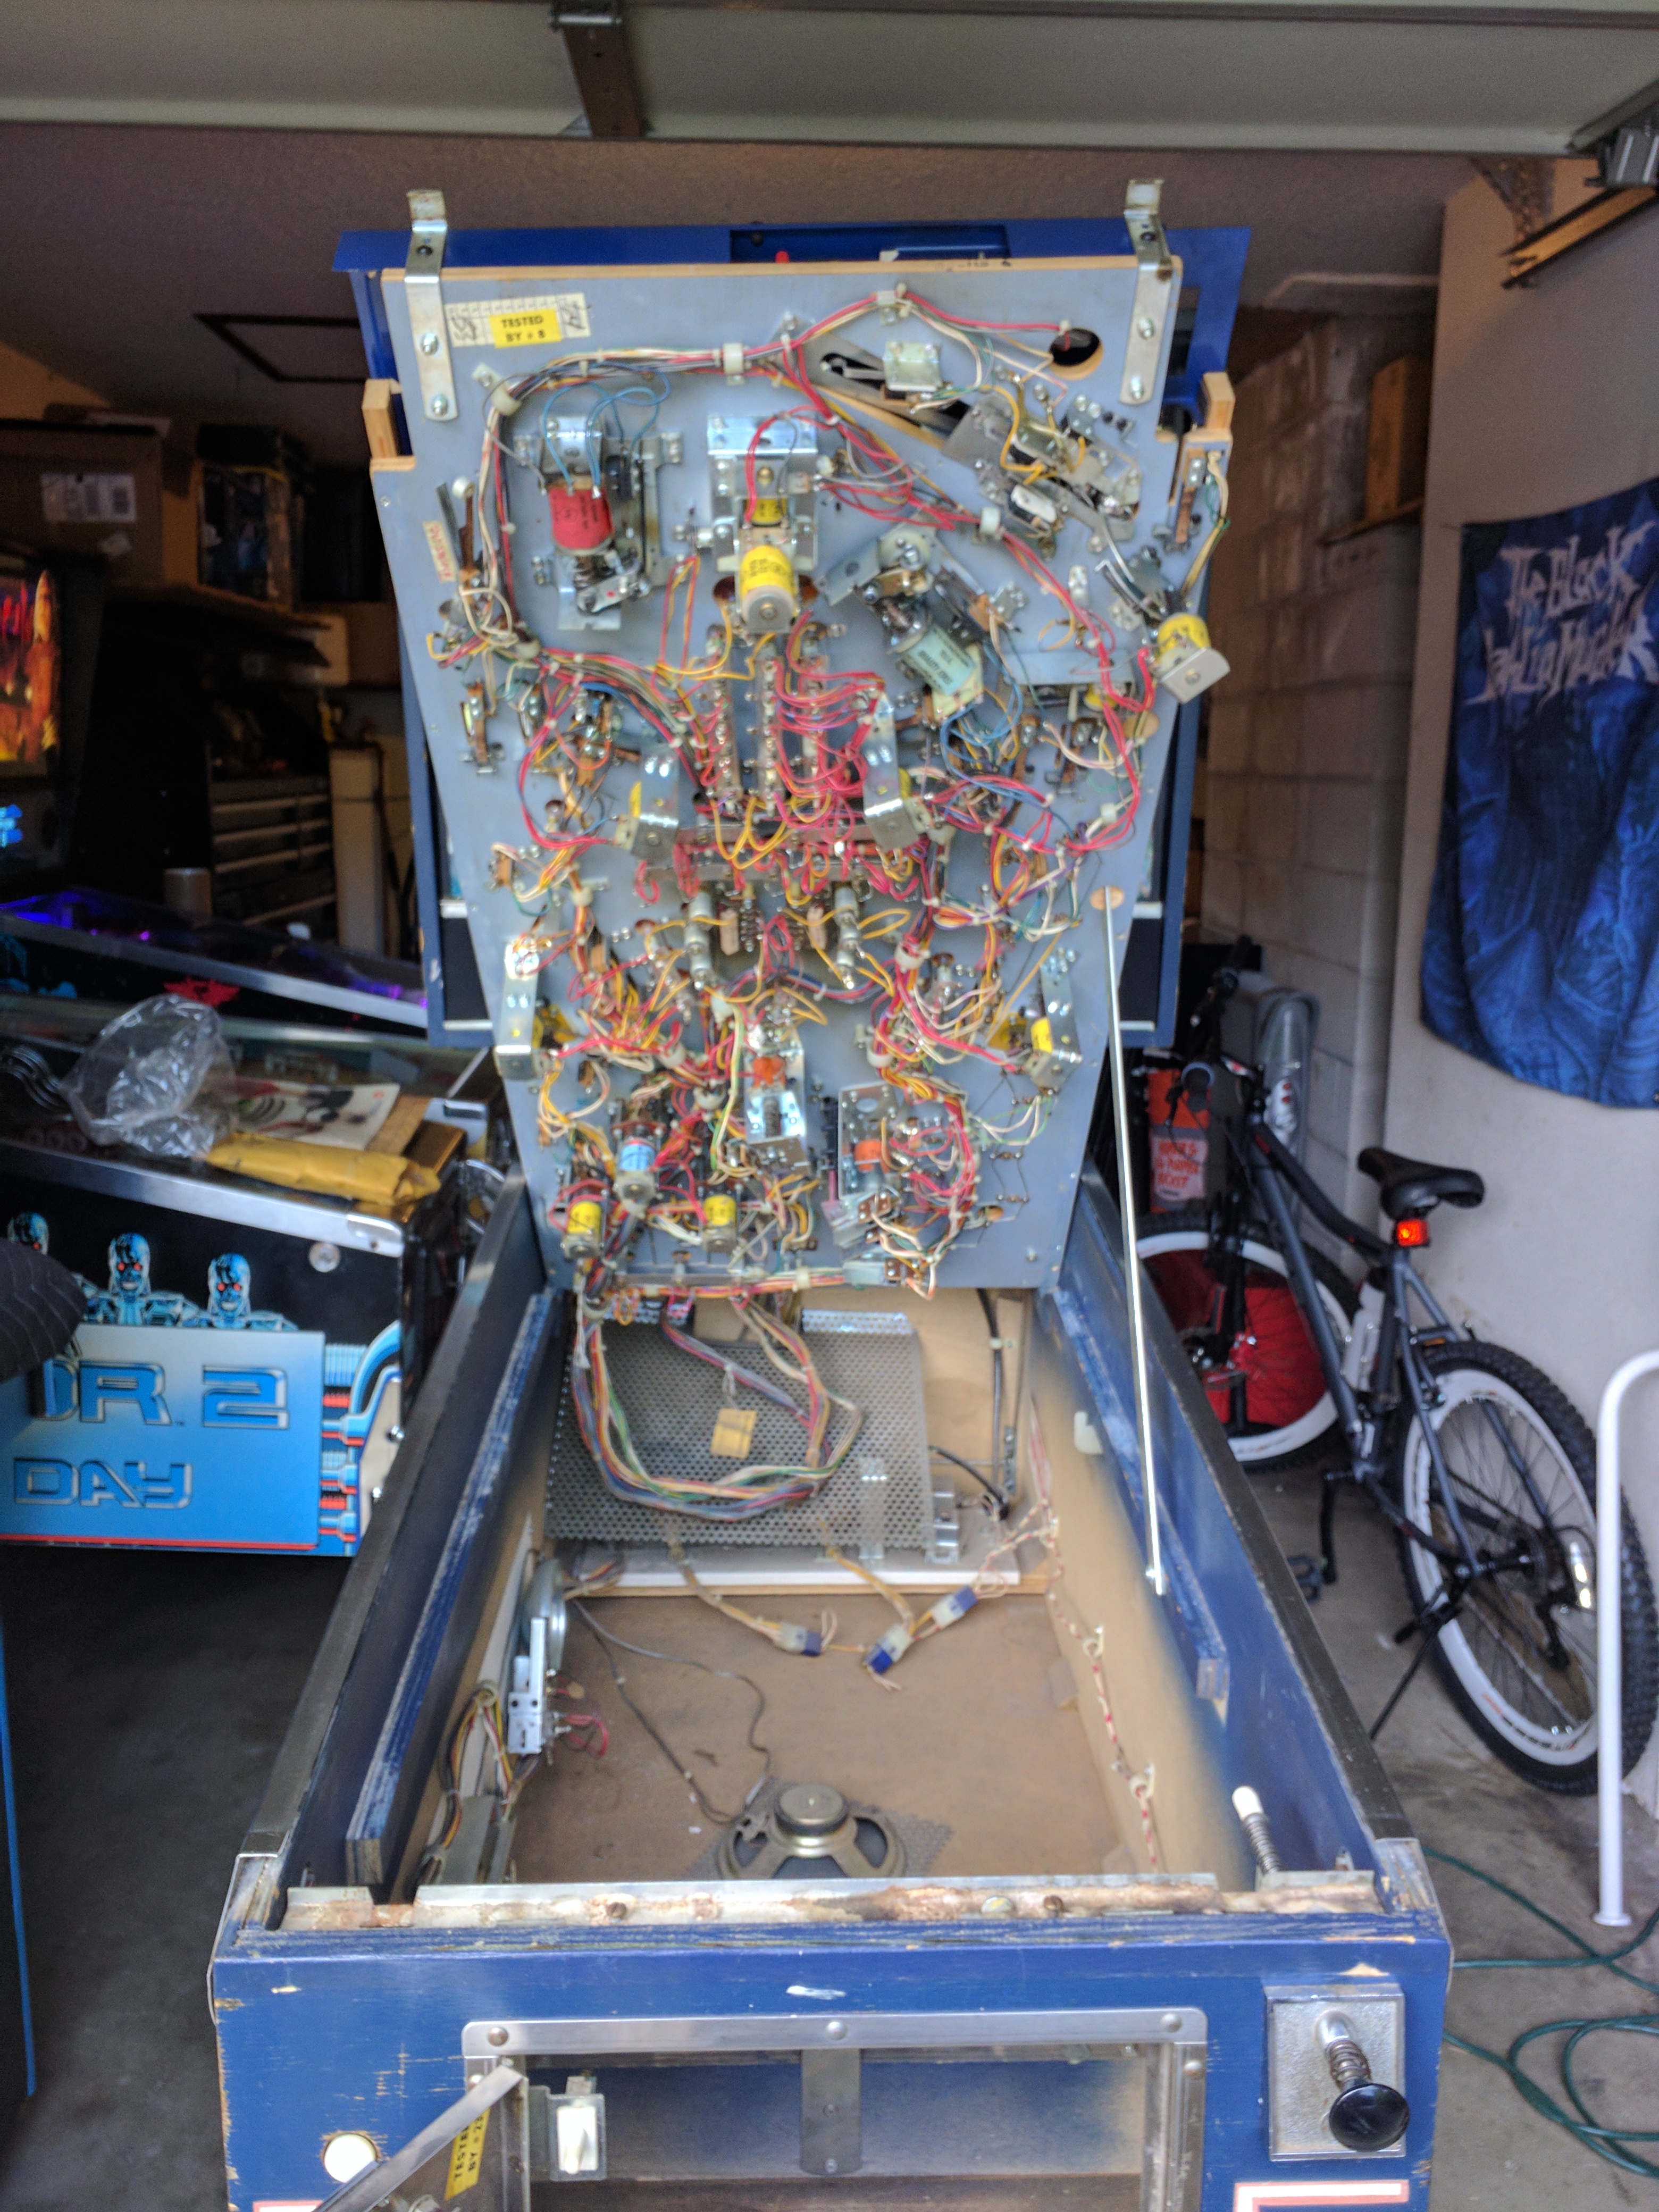


Check that flipper coil out in the full-resolution picture. Yes, that is a little bungie acting as the spring.The game actually came with a cashbox, and with the MANUAL (and schematics). This is the first game I have bought (video game or pinball) that actually came with any of the original documentation.
I guess keeping the manuals inside the game isn’t something everyone does. I really like having the manual and schematics with the game, even with PDFs freely available. It just makes the game feel complete to me.
Summary
With a look over everything, I have a good list of the Good/Bad with this game, and what I need to do to get started.
Bad:
- Backglass is torn up - Replace with a new backglass, or one of the few replacement translites (if I can get one)
- Playfield is very grimy, overall wear/tear, and some moderate wear by pop bumbers and shuttle ramp - Remove the mylar, deep clean the playfield, touch up parts that need it, and clearcoat! (Maybe.. we’re not there yet)
- Shuttle looking not-so-great - Get a replacement one, or repair this one and repaint.
- Cabinet faded - Recolor with stencils(?). Really, it doesn’t look too bad as-is. The red is uniformly faded across the entire cabinet.
- Coils weak, flippers beat up - Rebuild flippers and replace solenoids that need it.
Good:
- Plastics are all in great condition and have no cracks or breaks.
- Main playfield area looks great, no wear or loss of paint.. yet.
- Cabinet is solid.
- Boards and wiring look absolutely great.
- Plasma displays look and work like new.
Not to mention, I’m also going to replace all the bulbs with colored LEDs and get the coin acceptors and coin door lock reinstalled. They were removed by the previous owners, but kept with the game.
I should note that you don’t need to modify the coin door for free play with this game. Just change setting #18 “Max Credits” to 0. Even the early solid-states had configurable settings.
What Now?
Luckily, this process has already been documented a couple times for me! Ed Cheung, principal engineer of the Hubble Space Telescope, is an avid fan of pinball, and heavily documented his work on his Space Shuttle. Interesting note.. he bought his game back in 2005 for also $600 (Although his cabinet paint and backglass was better).
Ed has gone so far as to recreate the playfield and the backglass, help CPR do a run of new replacement playfields several years ago and print out several new translites to replace damaged backglasses. Unfortunately, I will probably not be able to obtain any new translites from him, as it’s been a number of years since he last worked on them.
Overall, I’m really looking forward to working on this game and documenting the repairs/restoration. Before, I’ve bought games that were already worked on. I think this will be a great learning experience for me, and the end result will be a great 80s solid-state that will be a fun addition to my collection, for much cheaper than I could’ve spent on a shopped one.
Seriously, the 3 Space Shuttles on eBay right now are $8000, $3600, and $3500.. none including shipping. That’s a different discussion, however.